Instructions for use

THERMOFORMING MACHINES

Thermoforming
- Build a good plaster model using hard plaster or good-quality 3D resin.
- The plaster model should not be too high and should therefore be thinned down as much as possible. The base of the model must have a smooth surface. Remove any parts of the model (vestibule, buccal floor) that may prevent proper thermoforming. Carefully remove any undercuts and round off any sharp edges on the plaster.
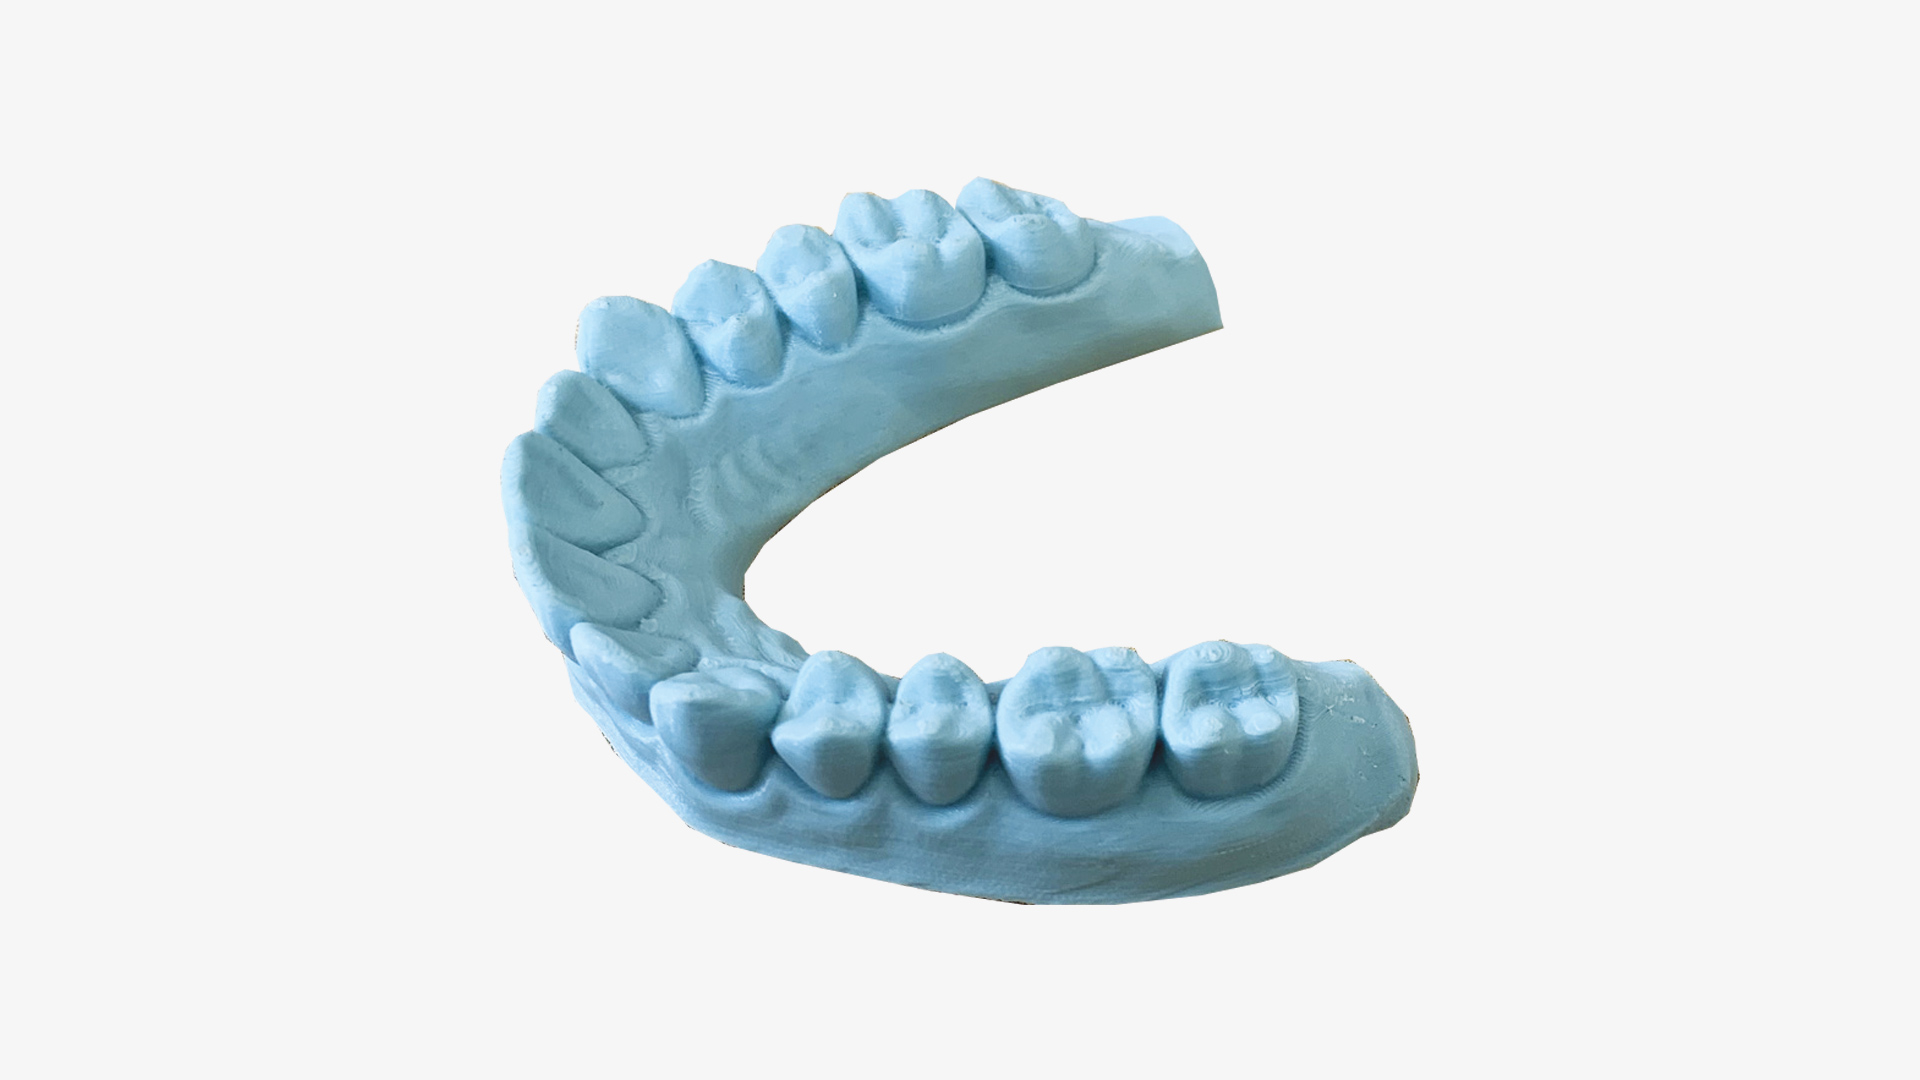
- The resin model, printed using a 3D printer, should ideally be made as low as possible and in a U-shape (horseshoe shape). (Img. 1).
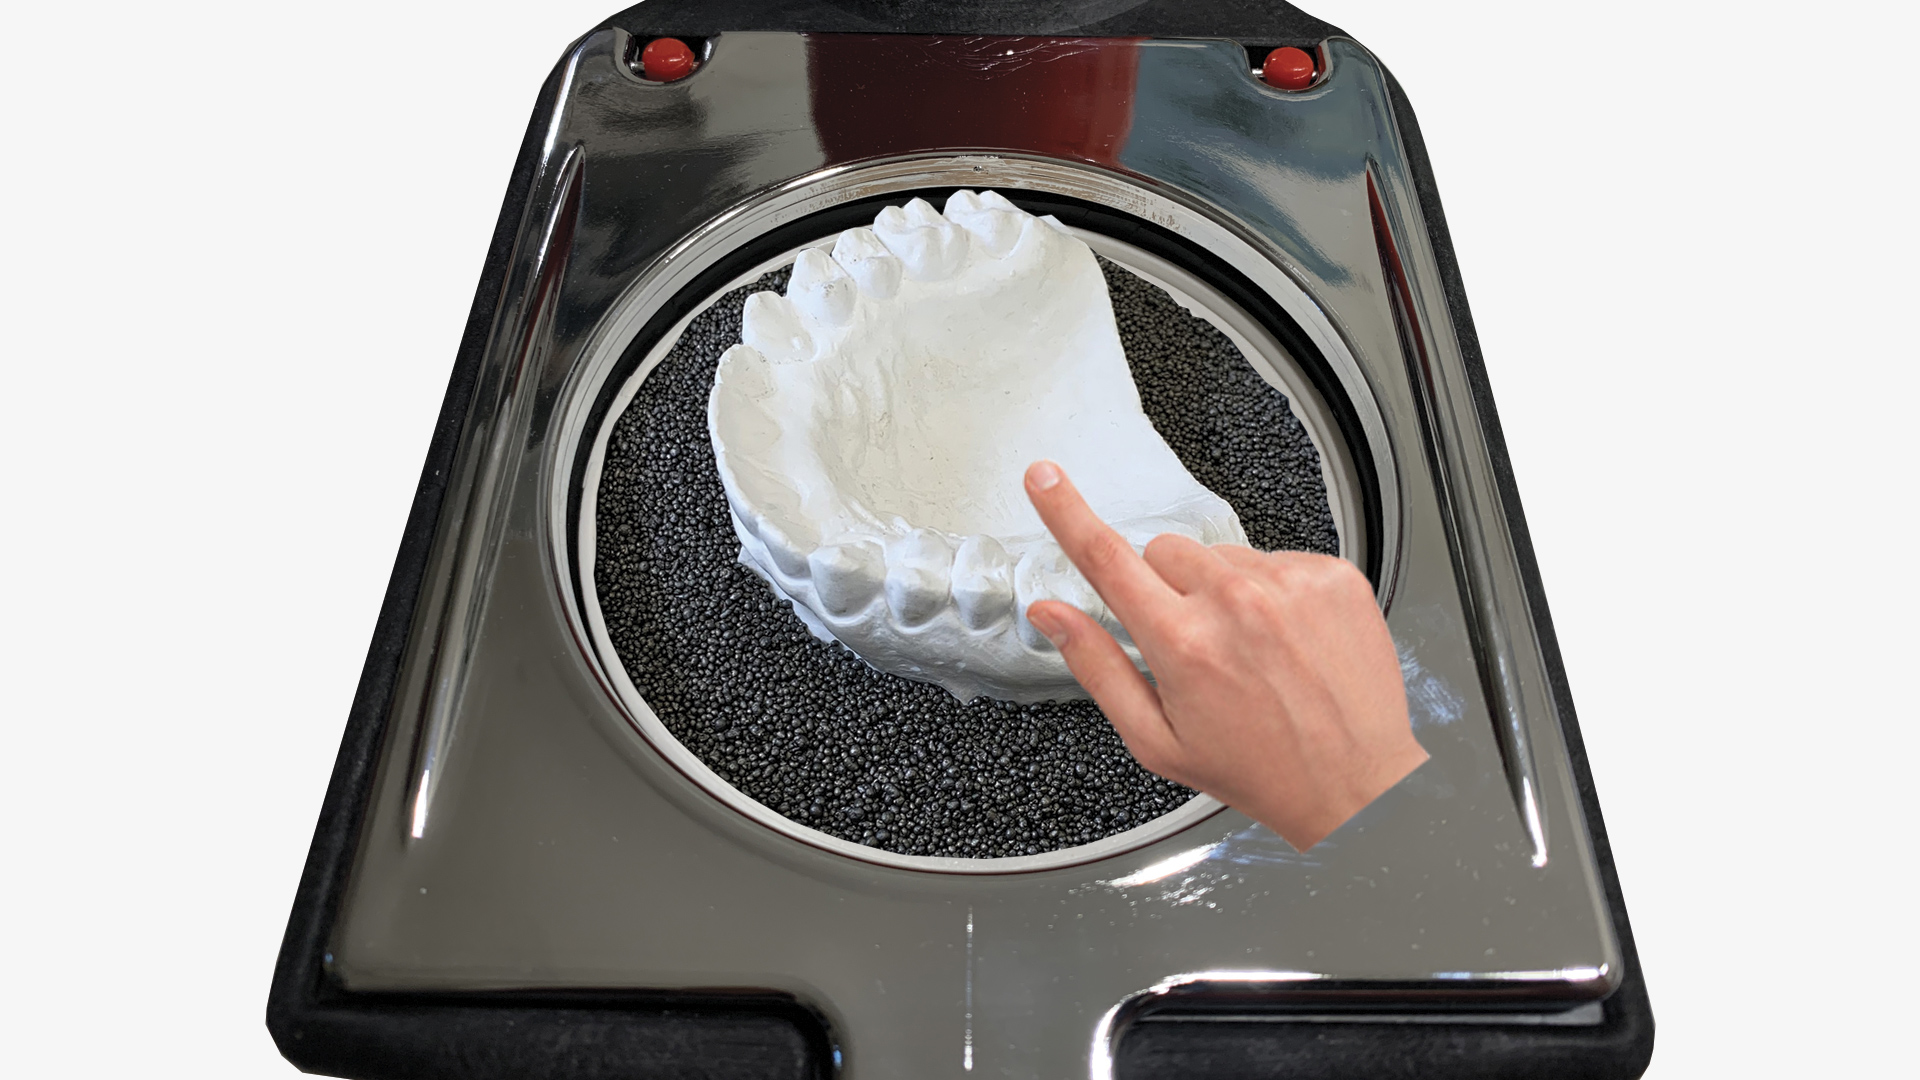
- During thermoforming, the material always becomes thinner than its original thickness. As a general rule, for every centimetre of the mould’s height, there is a loss of thickness of approximately 20 per cent. For this reason, it is necessary to reduce the mould’s height as much as possible, or to place the mould in the thermoforming machine’s chamber and cover it with stainless steel granules, leaving only the area to be formed uncovered. (Img. 2).
- If you use airtight resin moulds or lacquered moulds, there is a risk of incomplete thermoforming because the air cannot escape completely from between the mould and the thermoplastic sheet.
- Heat the disc in accordance with the temperatures and times listed in the ‘Temperatures and times’ section of the IFU for the chosen material.
- Lower the clamping plate of the B-FORM® thermoforming machine until the heated disc completely surrounds the plaster or 3D resin mould.
- Switch on the vacuum and you’ll have your byte in a matter of seconds.
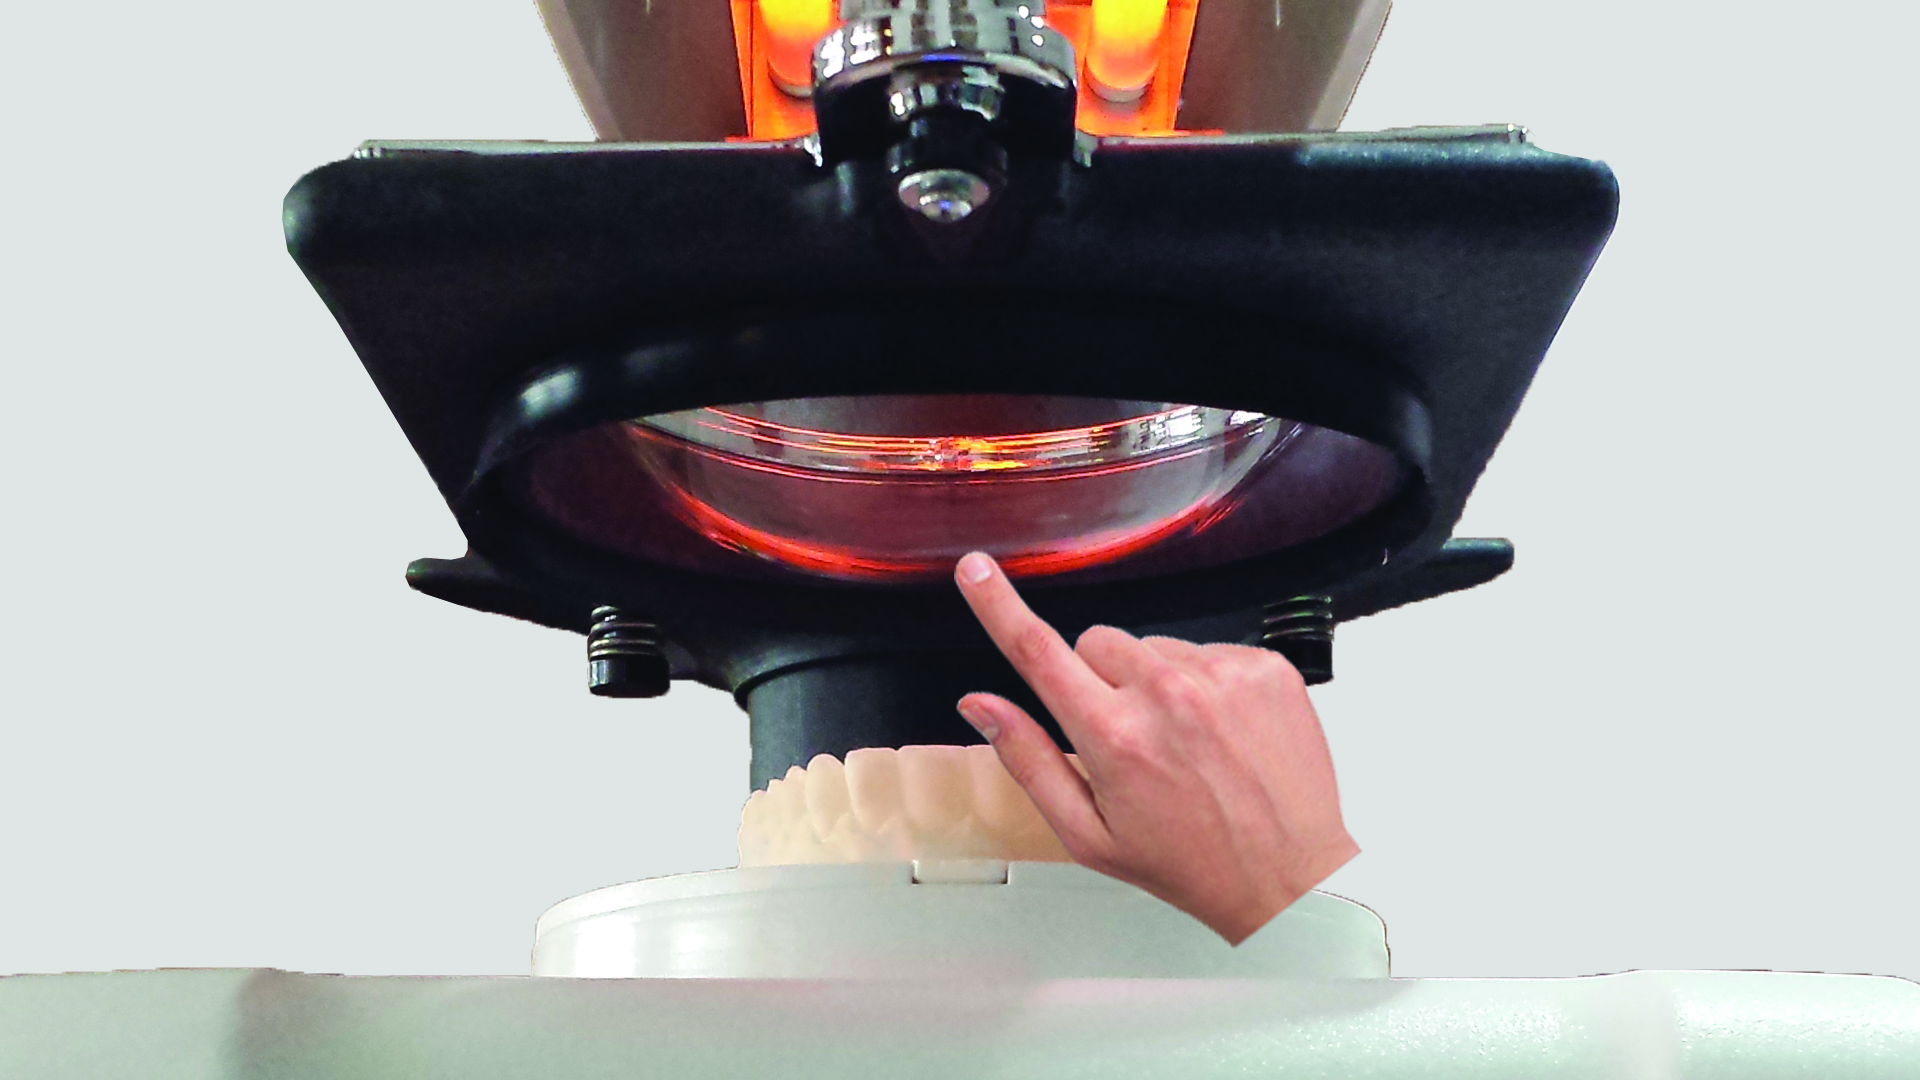
- With B-FORM® thermoforming machines, thermoforming takes place in the axial direction, whereby the heated sheet is guided vertically down onto the mould, completely enveloping it, thereby ensuring uniform thickness across the entire surface of the mould.
- Allow the newly moulded part to cool before removing it from the mould.
- To make removal easier, cut the plastic as close as possible to the edge of the model using scissors and cutters GHOST ALIGNER®.
- Whilst the patient is using the mouthguard, it is recommended that they sanitise it daily with the SPORISAN® Gel.
Safety precautions
Please read this and take the following precautions before using the thermoforming machine.
Positioning
- The heat press must always be placed on a flat, open surface: under no circumstances should the heat press be operated whilst it is inside a piece of furniture.
- Do not place the thermal printer too close to walls, furniture or any other equipment whilst it is in operation, due to the heat emitted by the heating element in the heating plate.
- Do not place the thermal printer near flammable liquids, such as alcohol or solvents. If the internal electrical components come into contact with flammable liquids, this could result in a fire or electric shock. Should any of these liquids enter the thermal printer, unplug the power cable immediately and contact your dealer.
- Do not place the thermoforming machine in the following areas. This could result in fire or electric shock:
- Areas with high humidity.
- Areas exposed to direct sunlight.
- Areas with high temperatures.
- Areas near sources of flame.
Power supply
- Do not damage, cut or alter the power cord. Do not place heavy objects on top of it, and do not pull on or bend the power cord excessively. Damaged wires may cause a fire or electric shock.
- Do not plug in or unplug the power cable with wet hands. This may result in an electric shock.
- Do not plug too many plugs into a single socket. This could result in a fire or electric shock.
- Always make sure that the power cable is properly plugged into the socket. If it is not fully plugged in, it could cause a fire or an electric shock.
- Do not use any power cables other than the one supplied. This could result in fire or electric shock. If you use a power cable not supplied by the retailer, ensure that it complies with the standards in force in your country. If the power cable is faulty, contact the manufacturer or your authorised supplier to have it replaced.
- As a general rule, do not use extension leads. This could result in fire or electric shock. If you must use an extension lead, do not use one longer than 5 metres. Ensure that the extension lead is not twisted and that the power cable is correctly connected to the extension lead. Do not use multiple extension leads.
- Do not use extension leads in corridors or other high-traffic areas where they may be trodden on or cause people to trip. This could damage the cables and lead to fires or electric shocks.
- Do not connect the thermoforming machine to a mains socket with a voltage other than that specified. This could cause a fire or electric shock.
- When unplugging the power cable, always hold the plug itself. If you pull on the power cable itself, the metal wires may be damaged, which could cause a fire or an electric shock.
General precautions for use
- Do not dismantle or modify the thermoforming machine. This could lead to fire or electric shock as a result of the improper use of its components.
- If you hear any unusual noises, see any smoke, feel excessive heat or notice any unusual odours, unplug the power cable and contact your retailer. Continued use could result in fire or electric shock.
- If you are not using the thermoforming machine for long periods, such as at the weekend, please ensure you unplug the power cable as a precaution.
- Take great care when moving the thermoforming machine. Dropping it could cause injury.
- Wait until the thermoforming machine has cooled down before covering it. Otherwise, a fire could break out.
- When you switch on the heating element for the first time, some smoke may come out of it. Don’t worry, as this is due to dust that has built up on the heating element.
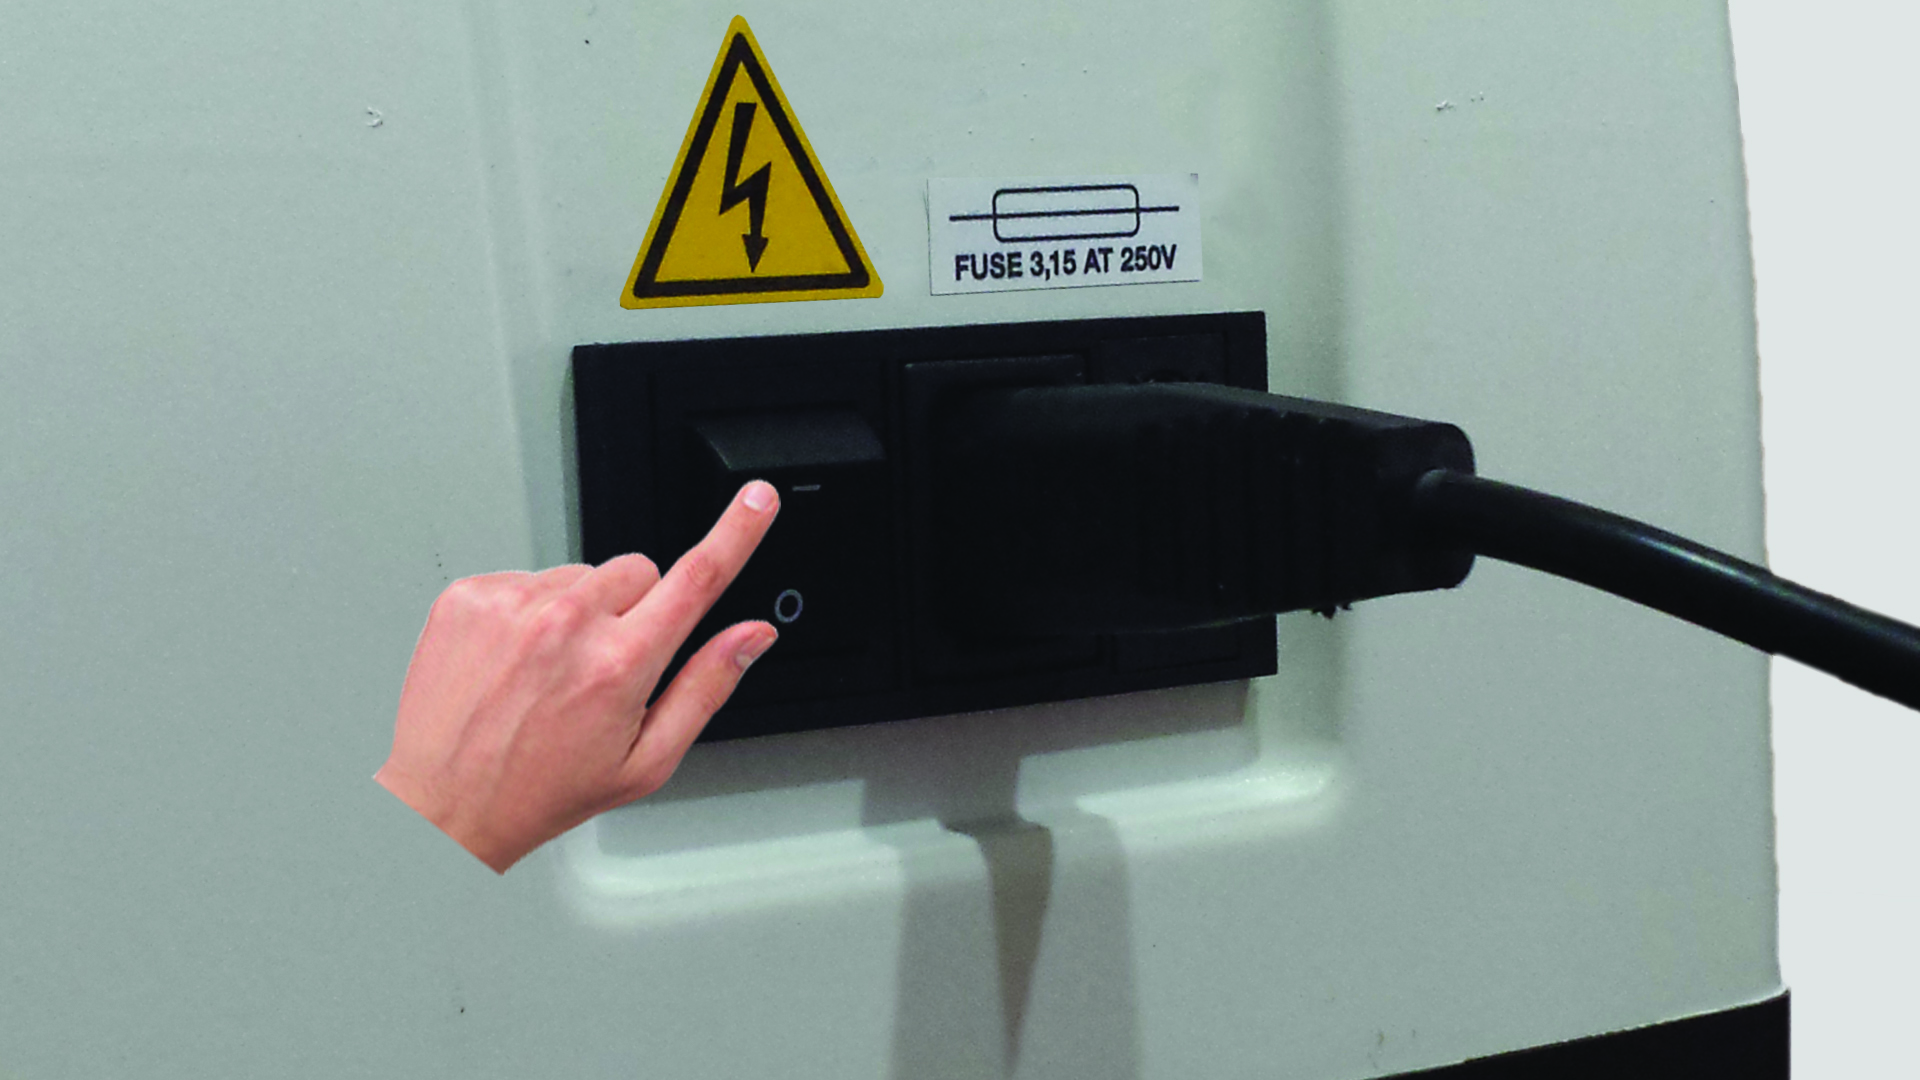
- When you have finished using the thermoforming machine, remember to switch off the power switch, located at the back of the machine (Img. 6).
- We recommend that you do not throw away the cardboard box and the packaging materials. They are the ideal container for transporting the thermoforming machine should technical assistance be required.
WARNING: Any damage caused during transport whilst the item is in packaging other than the original packaging will not be covered by the 2-year statutory warranty.
Materials provided
Thank you for purchasing the B-FORM® thermal printer. Please check that all the following items are included in the box. If any items are missing or damaged, please contact your retailer. B-FORM® Silent (Img. 3), B-FORM® Comfort (Img. 3), B-FORM® Deluxe (Img. 3).
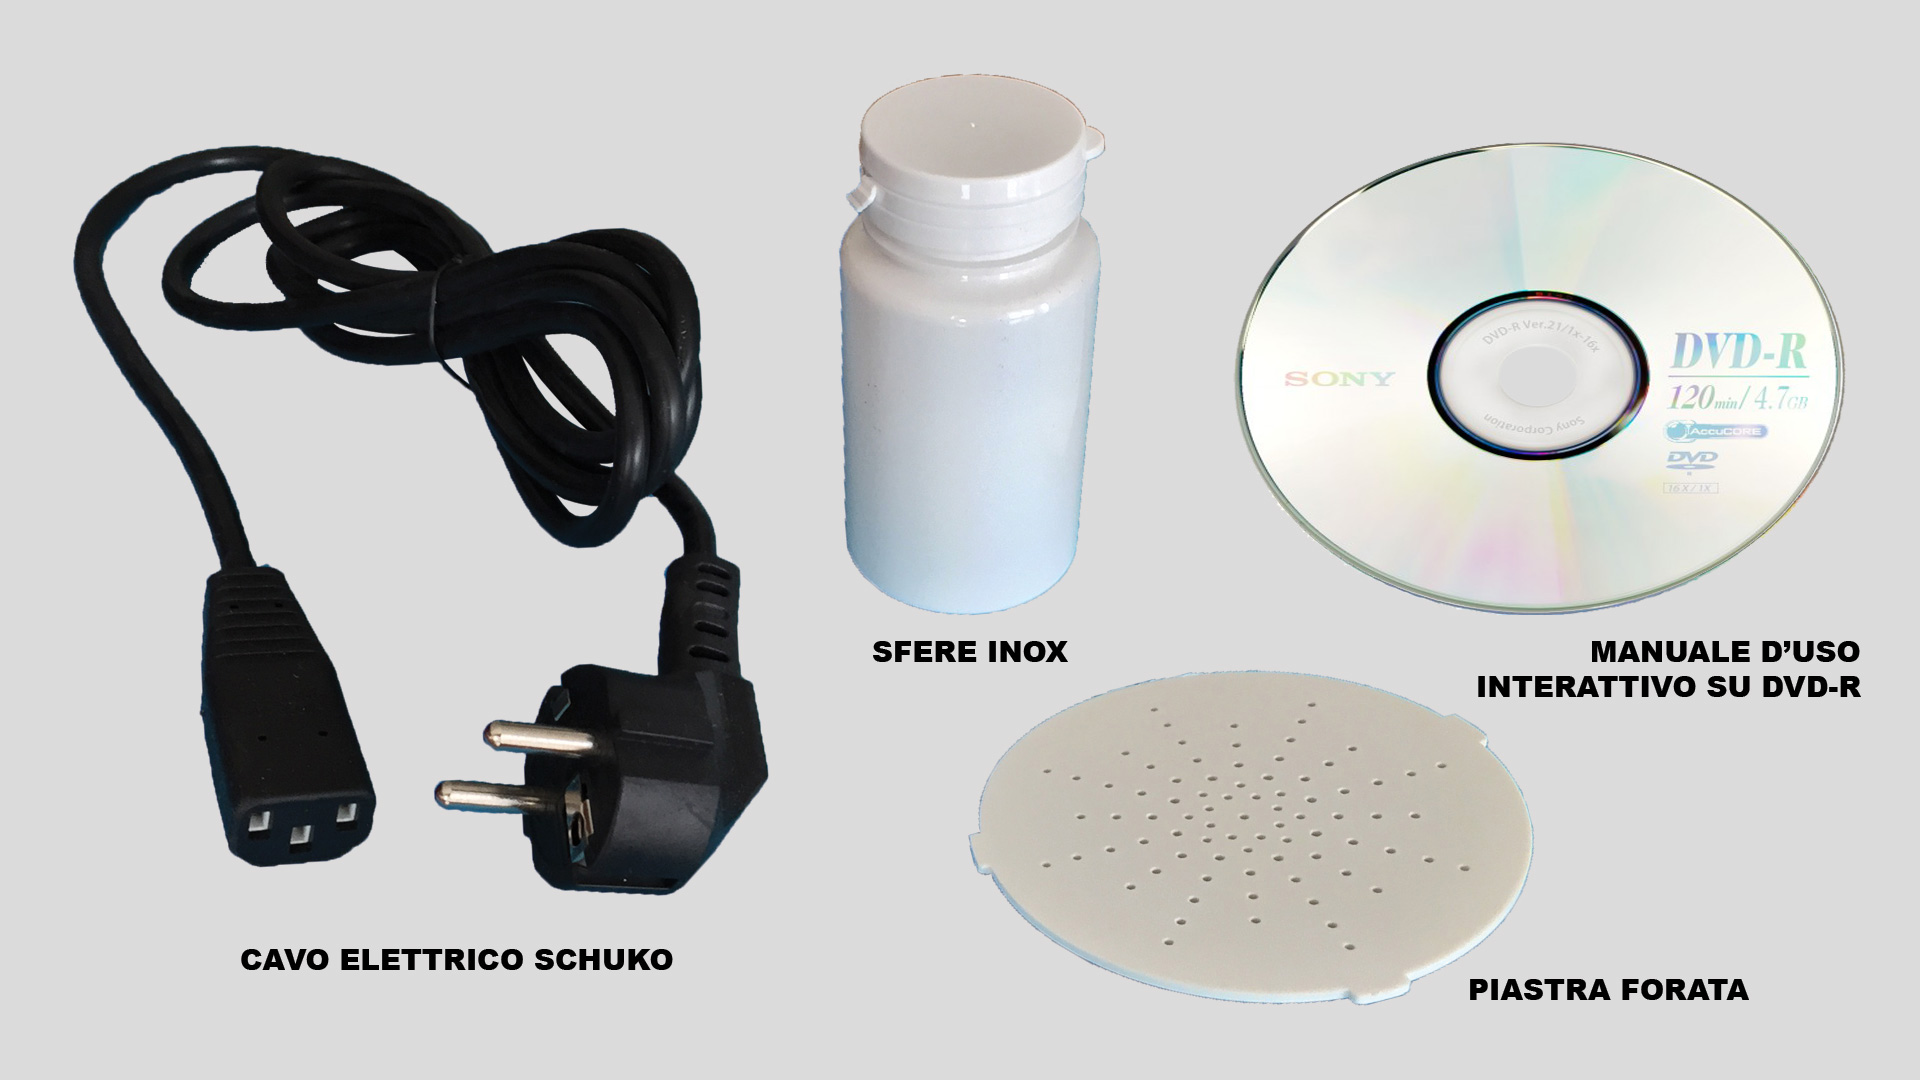
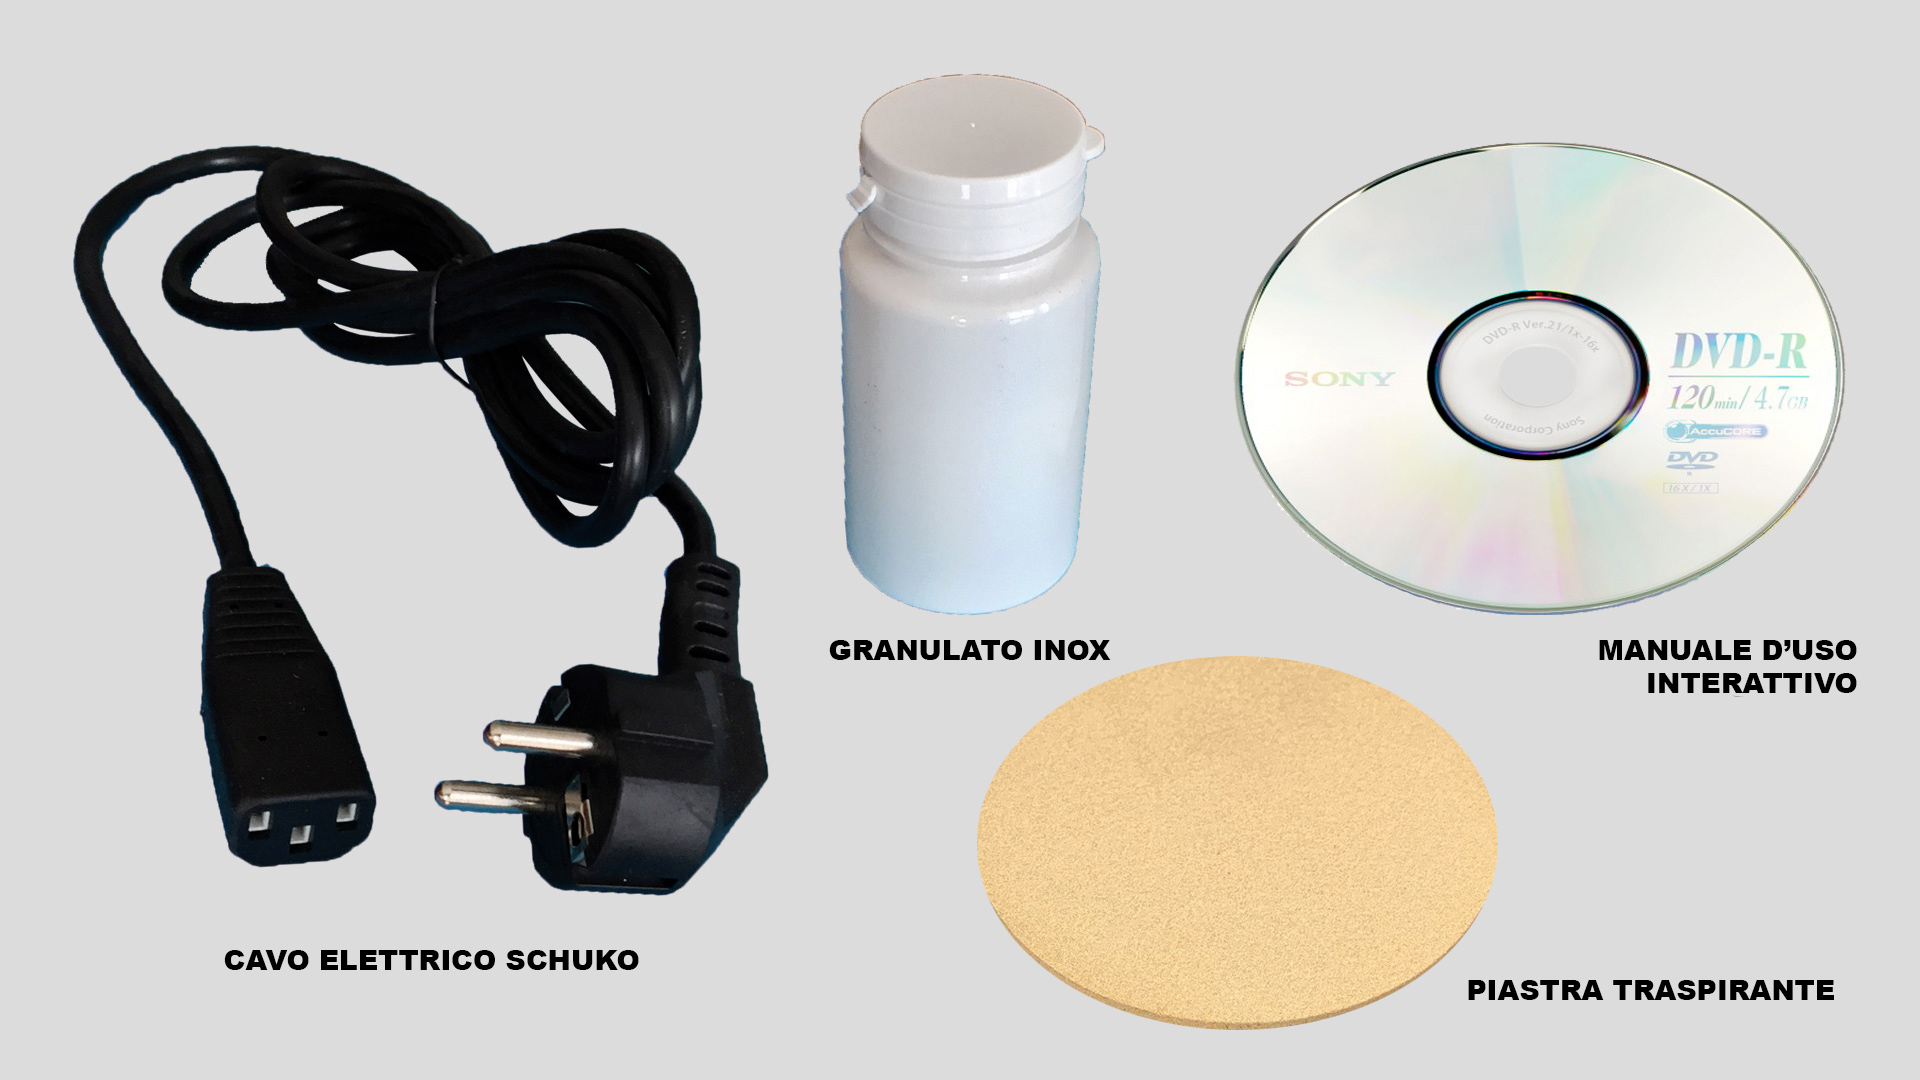
- The thermoforming machine.
- Schuko power cable.
- Perforated plate.
- Stainless steel granules for manholes.
- QR Code instructions for Use (eIFU).
Cleaning
To ensure the B-FORM® thermoforming machine is cleaned correctly, please follow these instructions:
- Do not use flammable sprays near the thermoforming machine. Furthermore, do not pour water, liquids or flammable liquids onto the thermoforming machine. If these liquids were to penetrate the thermoforming machine and come into contact with the electrical components, this could result in a fire or electric shock. If anything were to penetrate the thermoforming machine, immediately disconnect the power cable and contact your dealer.
- Always unplug the power cable when cleaning the thermoforming machine. Failure to do so may result in fire or electric shock.
- When cleaning the thermoforming machine, use a cloth dampened with water and wrung out thoroughly. Do not use flammable liquids, such as alcohol, benzene or solvents. If a flammable liquid were to get into the internal electrical components, it could cause a fire or an electric shock.
Maintenance
To ensure the B-FORM® thermoforming machine is maintained correctly, please follow these instructions:
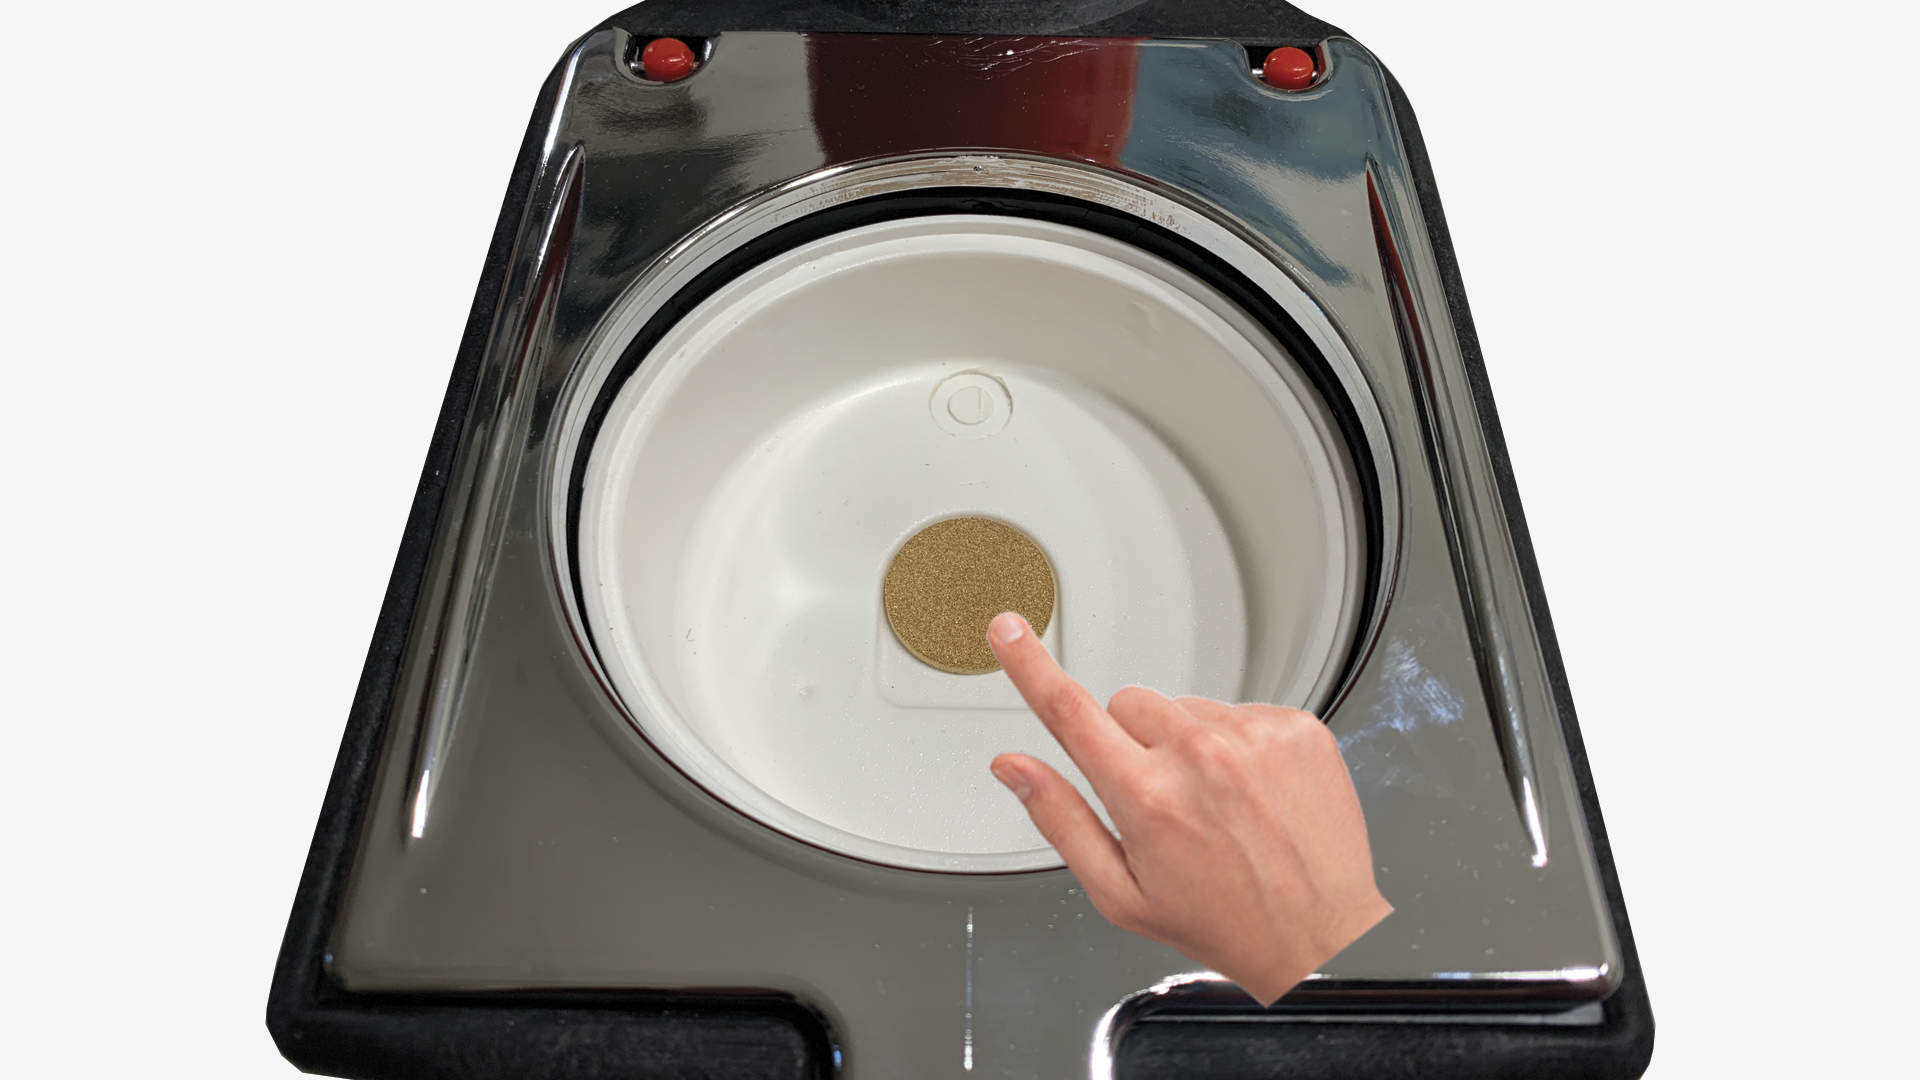
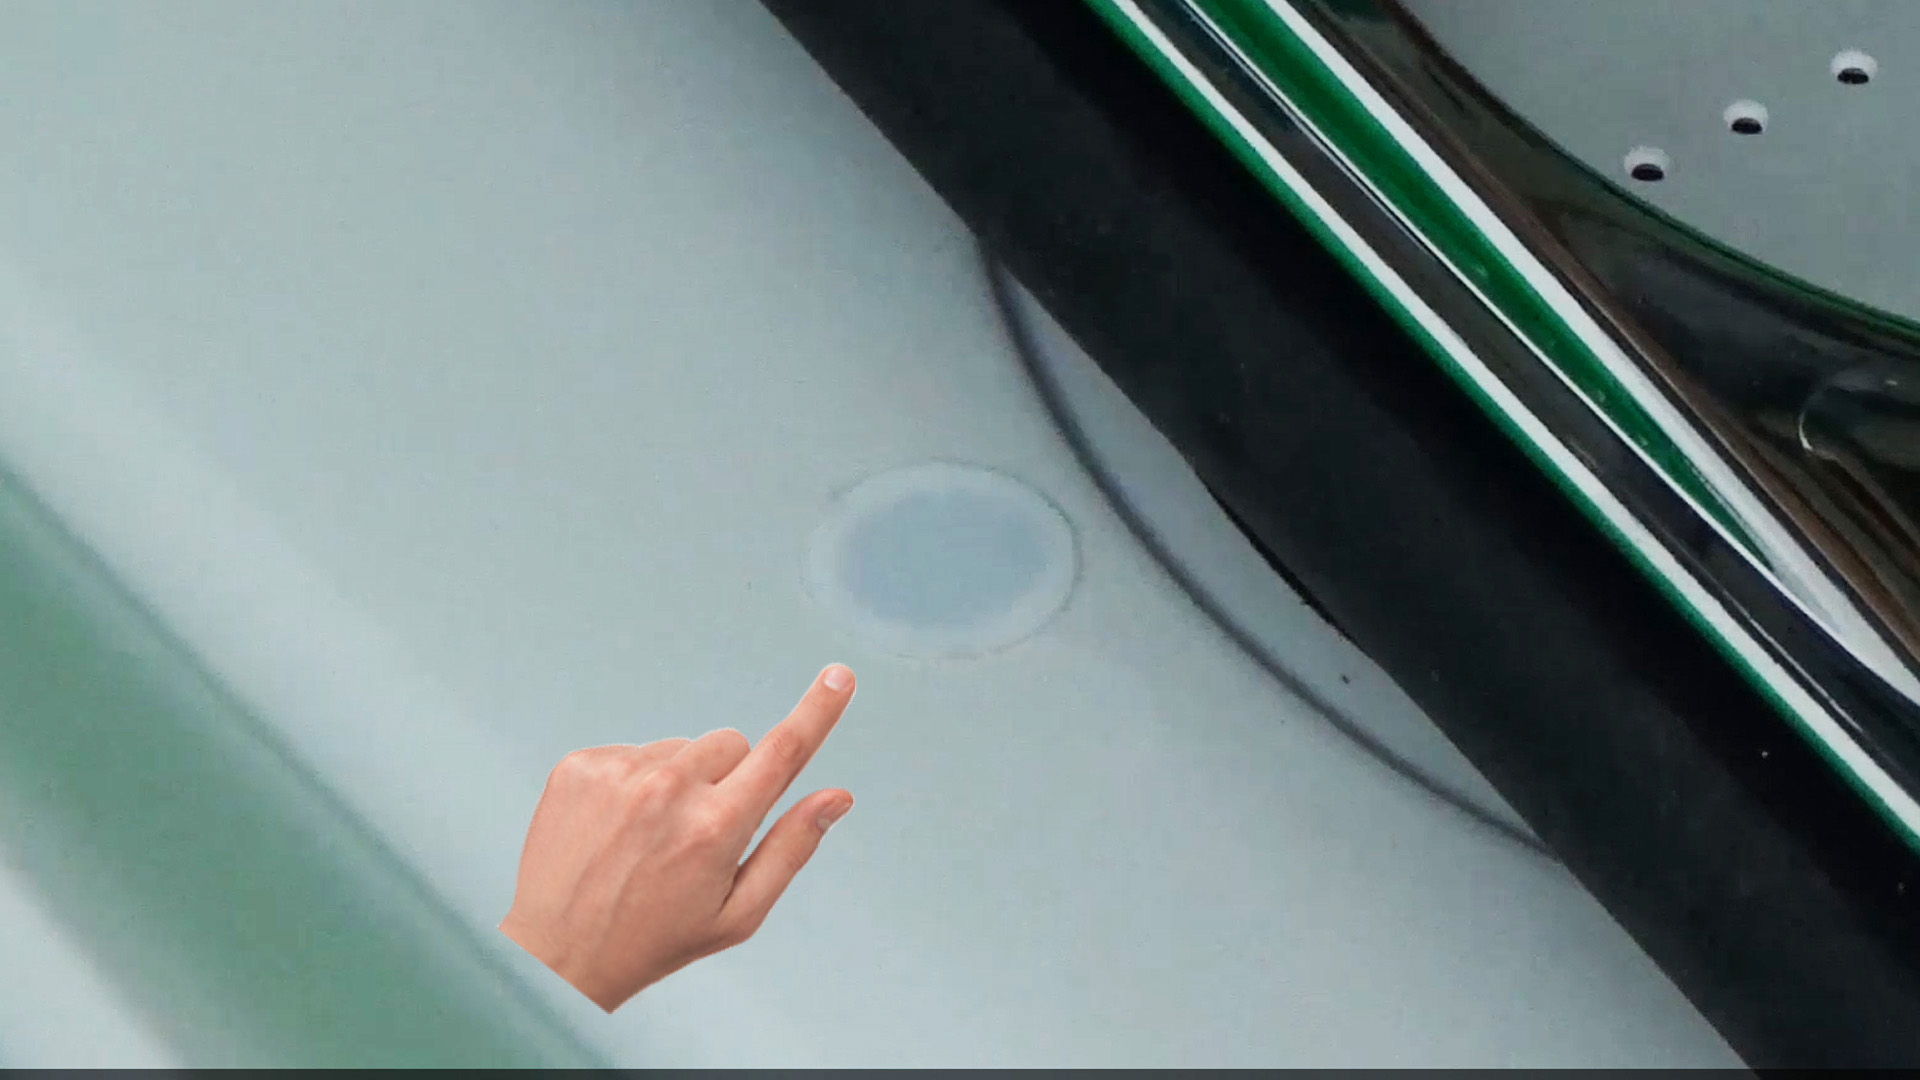
- The filter, located at the bottom of the sump, must always be kept free of any debris that may accumulate whilst the thermoforming machine is in operation. Therefore, the stainless steel granules must be removed from the sump periodically (if present), and this area must be thoroughly inspected, including the filter located inside it. (Img. 4)
- Check the power cable regularly for signs of wear and tear, and ensure that the plugs are properly connected.
- Replacing the fuse: Two fuses have been fitted into the electrical socket at the rear of the thermoforming machine to protect its various electrical components. If a fuse blows for any reason, it must be replaced.
To replace the fuse, proceed as follows:- Unplug the power cable from both the mains socket and the thermoforming machine’s socket.
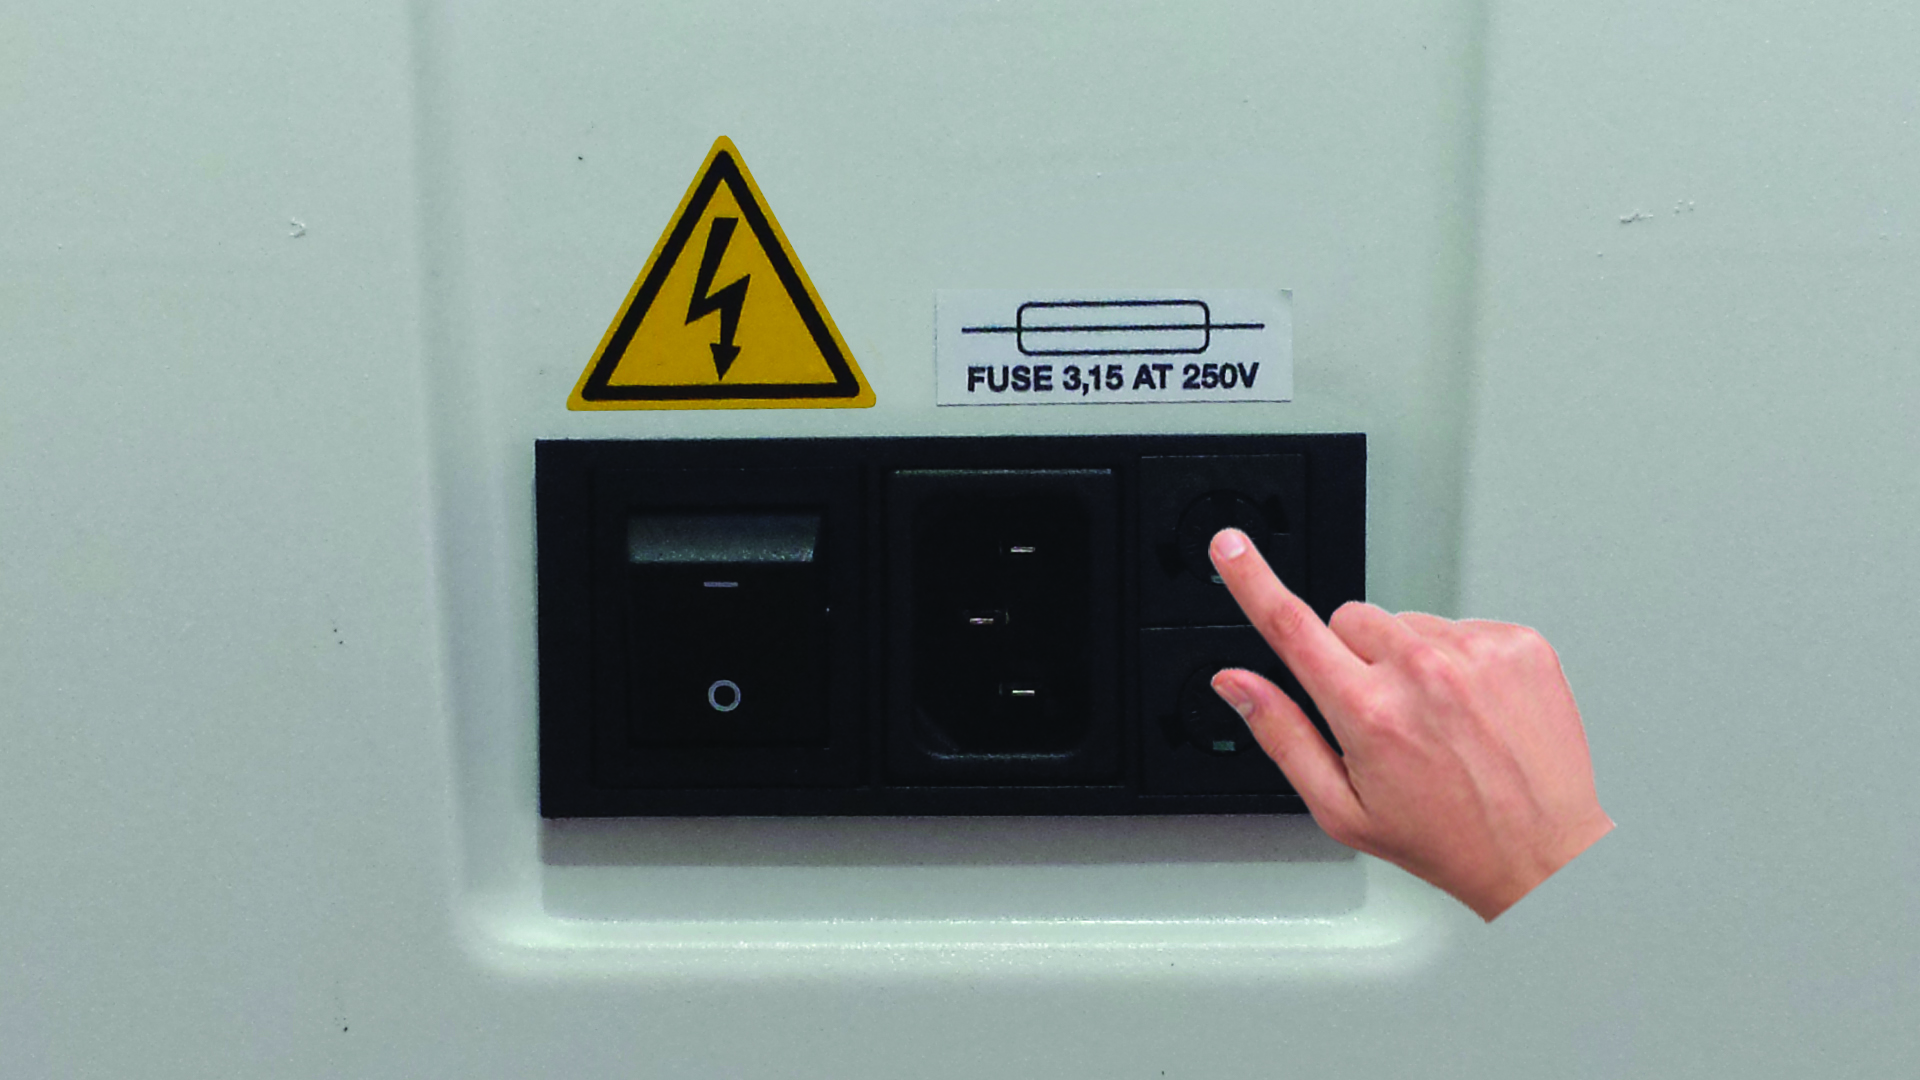
- Carefully open the fuse box cover using a screwdriver (Img. 5) and replace the old fuse with a new one. It is very important to keep spare fuses of the same type (3.15AT time-lag fuses for the 230-volt version and 6.30AT time-lag fuses for the 115-volt version) so that you can replace them if necessary. Using different types of fuses may cause damage to the thermoforming machine and therefore invalidate the warranty.
- Top-quality materials were used in the construction of the thermoforming machine. However, after a few years of use, the frame, the seals and a few other parts may wear out, and it may therefore become necessary to replace them.
Installation
The thermoforming machine is supplied ready for use. It takes just a few simple steps to set it up and get it running.
- Remove the thermal printer from its packaging and place it on a flat surface.
- Connect the female end of the power cable to the socket on the thermoforming machine, located at the rear, and the male end of the power cable to a mains socket. Never place the power cable near any source of heat. Switch on the power switch, located at the rear, and the thermoforming machine is ready for use. (Img. 6). A light will come on on the control panel, illuminating the ‘B-FORM’ logo, confirming that power is being supplied to the machine.
- When cleaning the thermoforming machine, use a cloth dampened with water and wrung out thoroughly. Do not use flammable liquids, such as alcohol, benzene or solvents. If a flammable liquid were to get into the internal electrical components, it could cause a fire or an electric shock.
WARNING: Before starting up the thermoforming machine, check that the mains voltage is correct.
Warranty
The B-FORM® thermoforming machine is covered by a 2-year warranty from the date of purchase against recognised defects in materials or workmanship.
Should a defect become apparent during the warranty period, the thermoforming machine will be repaired or replaced free of charge only if:
- The thermoforming machine has not been used for any purpose other than that for which it is intended.
- No unauthorised modifications or repairs have been carried out.
Warranty terms may vary depending on the country in which the thermoforming machine was purchased.
NOTE: The following are excluded from the warranty: seals, fuses, stainless steel granules and the power cable.
Repairs
For any type of repair, please send your B-FORM® thermoforming machine to your dealer or directly to our service centre.
Please follow these instructions for repairs:
- Always dispatch the thermoforming machine with a consignment note and accompanied by a precise and detailed description of the problem.
- The thermoforming machine must be sent to our address on a carriage-paid basis. Otherwise, the goods will be refused.
- The thermoforming machine will be returned from our premises to your address on a carriage-paid basis, with the delivery charges added to your invoice.
- All our repairs will be sent to you on a cash-on-delivery basis or upon advance payment.
- When dispatching the thermoforming machine, please ensure it is packed with great care using the original packaging. Under no circumstances should you use polystyrene beads as packing material, as they could become lodged inside the heating element and cause a fire.
Warranty terms may vary depending on the country in which the thermoforming machine was purchased.
WARNING: Never include the stainless steel granules in the packaging.
B-FORM® SILENT
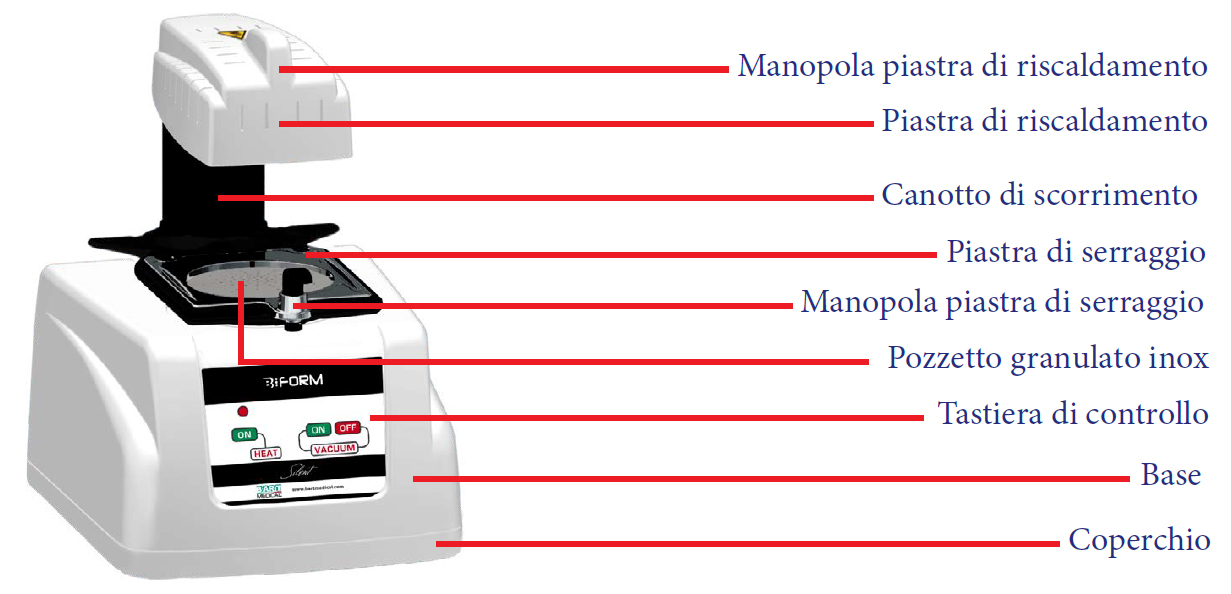
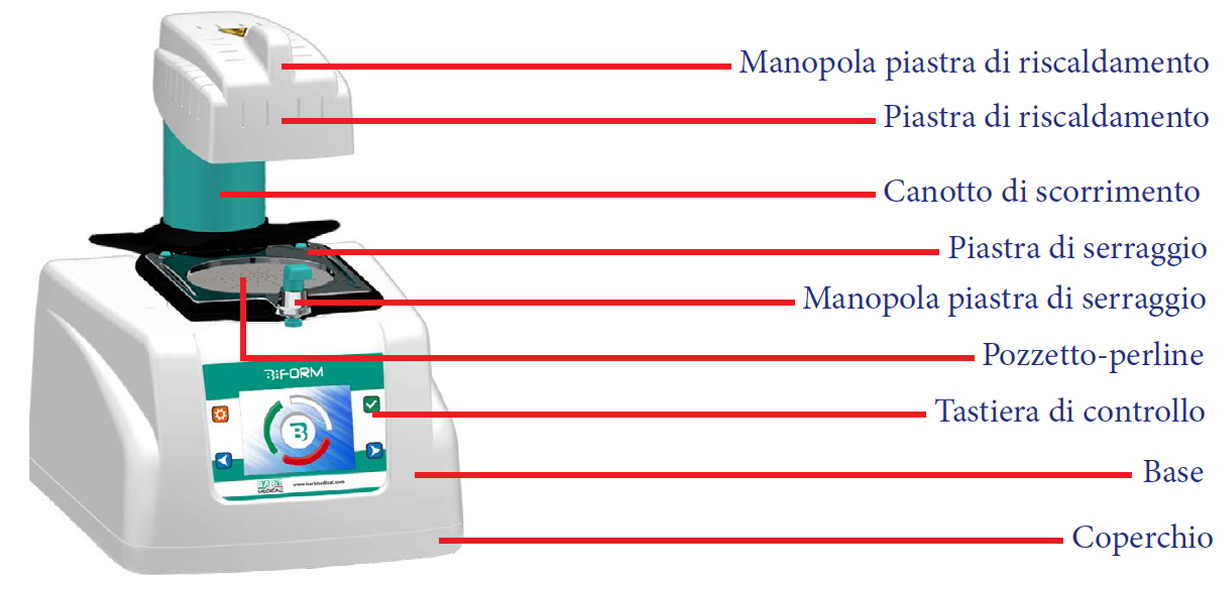
Manual thermoforming machine with a modern and attractive design, constructed from top-quality materials. Equipped with a fast-responding quartz heating element and a powerful, quiet, state-of-the-art integrated vacuum motor, it enables the thermoforming process to be carried out more quickly and with the utmost precision.
In this specific model, the disc clamping plate is raised and lowered manually, and the disc heating must also always be controlled by the operator.
The B-FORM® Silent offers universal disc compatibility, meaning that all commercially available sheets materials and sizes (square 125 x 125 mm, round Ø 120 mm and Ø 125 mm) can be used without having to change your working habits.
It is also fitted with a moulding chamber, which enables the thermoforming process to be carried out and consistently achieves excellent professional results, even with very tall plaster models featuring undercuts, sharp edges and a palate or oral floor.
2 years warranty.
PRODUCT FOR PROFESSIONAL USE
Instructions for use
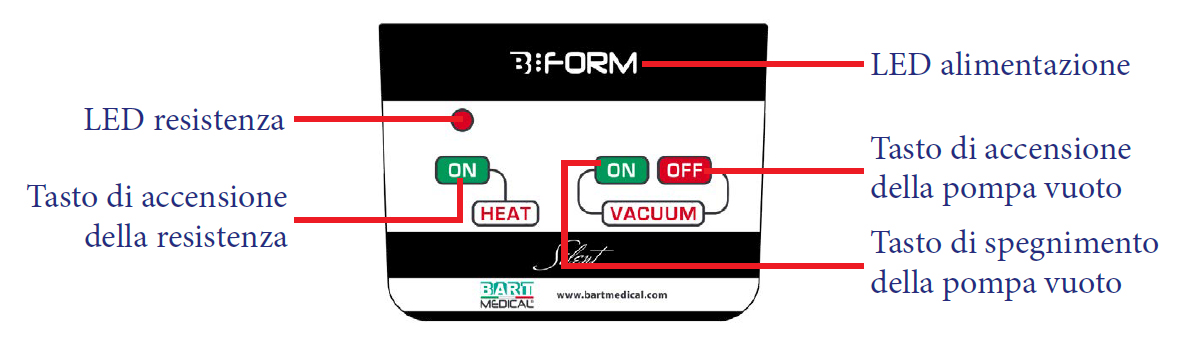
To ensure the B-FORM® Silent thermoforming machine is used correctly, please follow these instructions:
- Plug the supplied power cable into the thermal printer at one end and into a mains socket at the other end. Switch the main switch on the back of the machine to the ‘I’ position. (Img. 6), The B-FORM® logo lights up on the control panel to confirm that the machine is powered up and ready for use.
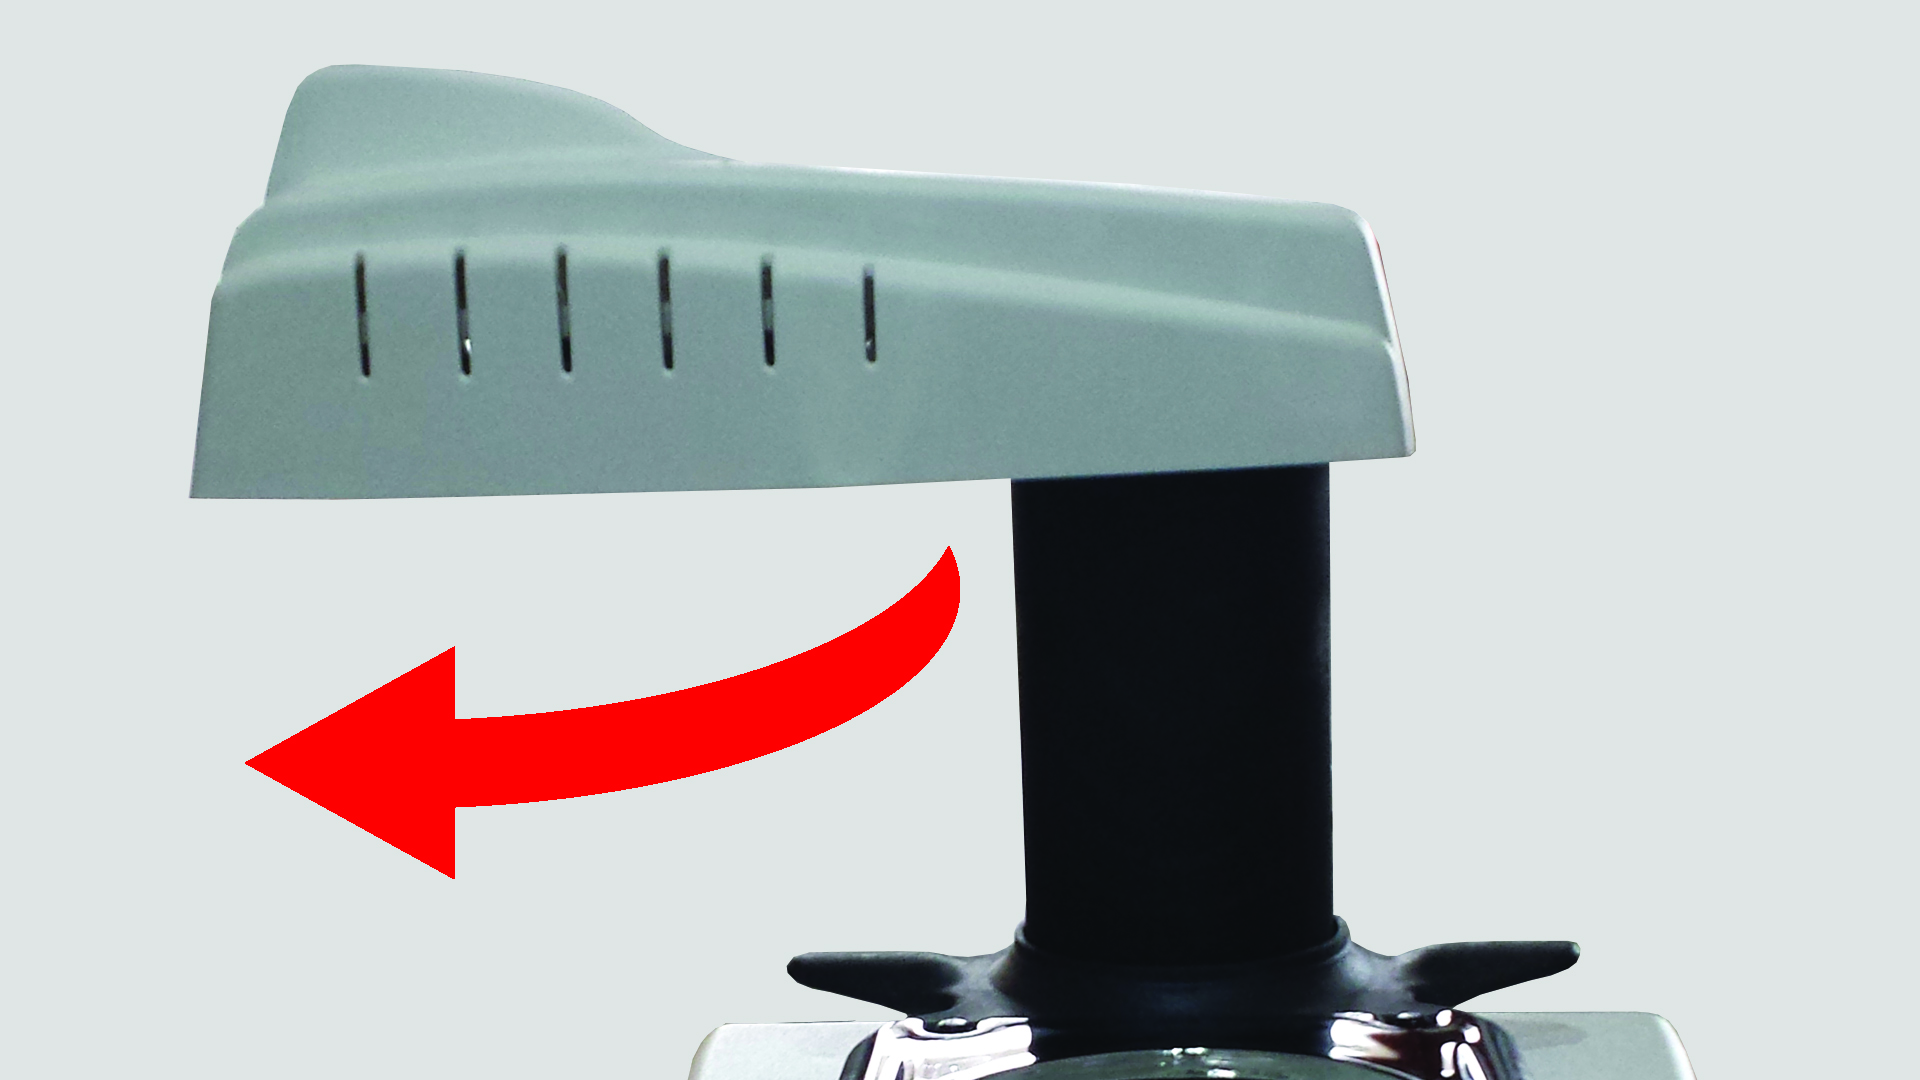
- Turn the heating plate to the left (Img. 7).
- Open the clamping plate using the knob provided (by pressing it and turning it through 180°) and insert the thermoplastic sheet to be moulded. Then close the clamping plate, again using the knob provided.
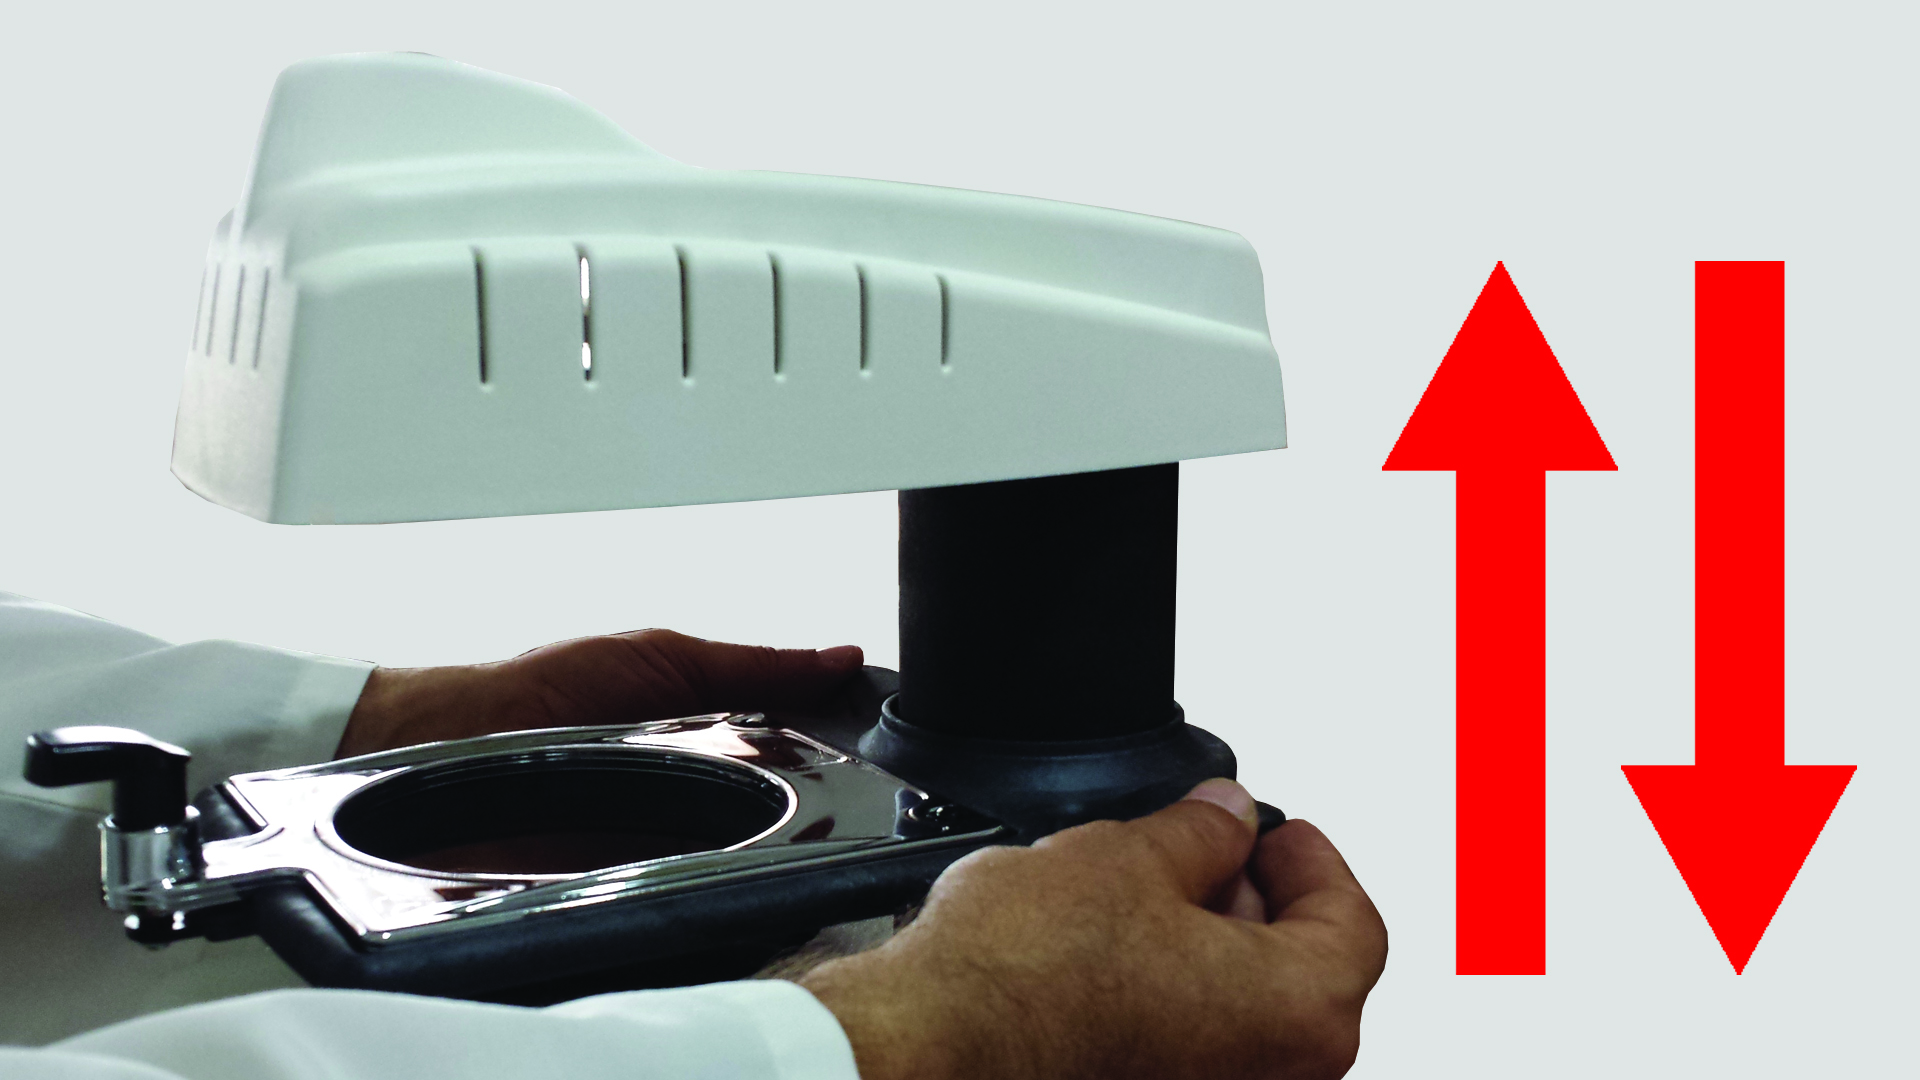
- Grasp both handles on the clamping plate and lift it until the plate reaches the end of its travel (Img. 9).
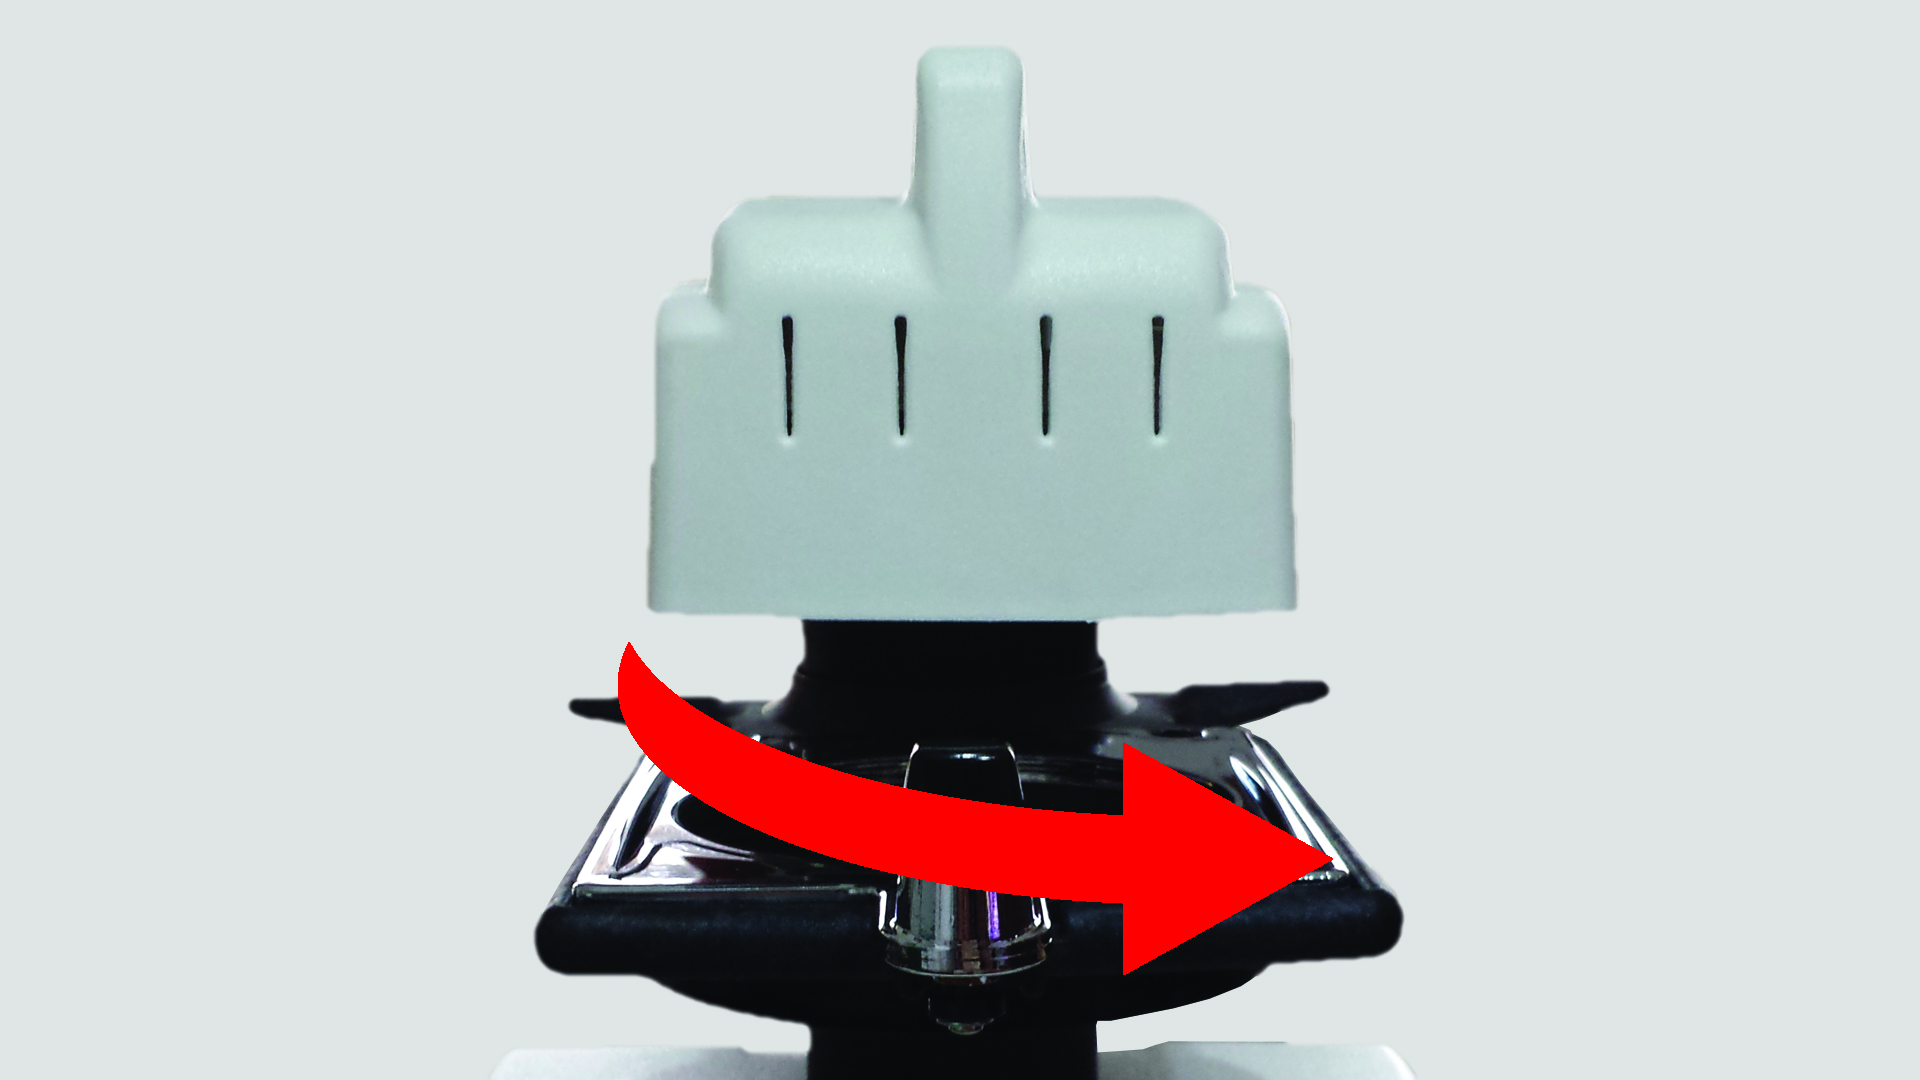
- Place the plaster mould on the perforated plate or in the recess after filling it with stainless steel granules (Img. 2). Turn the heating plate until it is pointing directly towards the clamping plate (Img. 11).
- Press the resistance button
 (HEAT), A red LED lights up on the control panel to confirm that the heating element is ready for use: the heating element does not need to be preheated and the thermoplastic sheet heats up quickly (it takes around 1–4 minutes, depending on its thickness).
 - When the thermoplastic sheet begins to curve noticeably by about 1.5 cm (Img. 12), Grasp both handles and lower the clamping plate fully onto the plaster model until the plastic sheet surrounds the model itself (Img. 9). Press the button (VACUUM) of the vacuum pump: for thermoforming the sheet (15–20 seconds is sufficient), the heating element switches off at the same time. The vacuum pump remains on for about 1 minute and then switches off automatically. If you wish to switch it off earlier, press the button
 (VACUUM).
 - Turn the heating plate to the left (Img. 7) and allow the newly made byte to cool using compressed air.
- Once the mould has cooled, use the handle provided to open the clamping plate and remove the mould together with the plaster model.
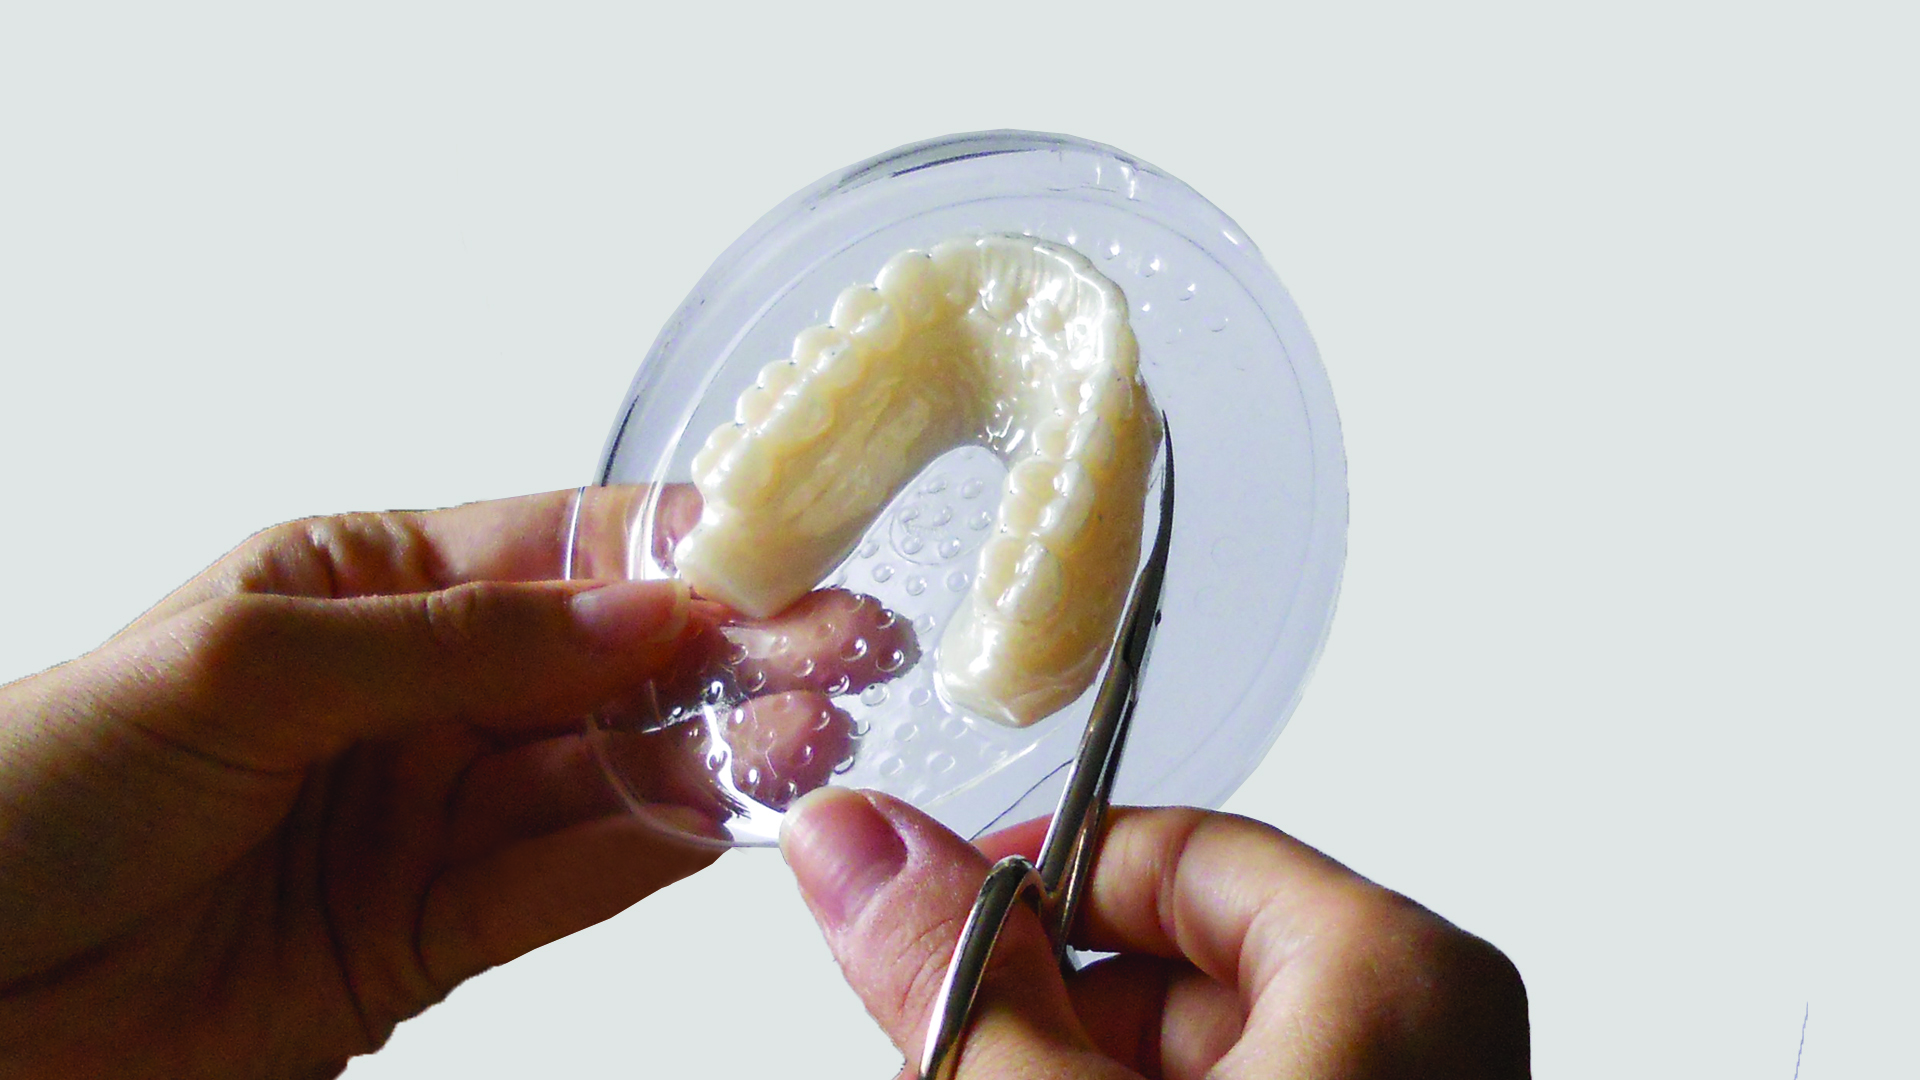
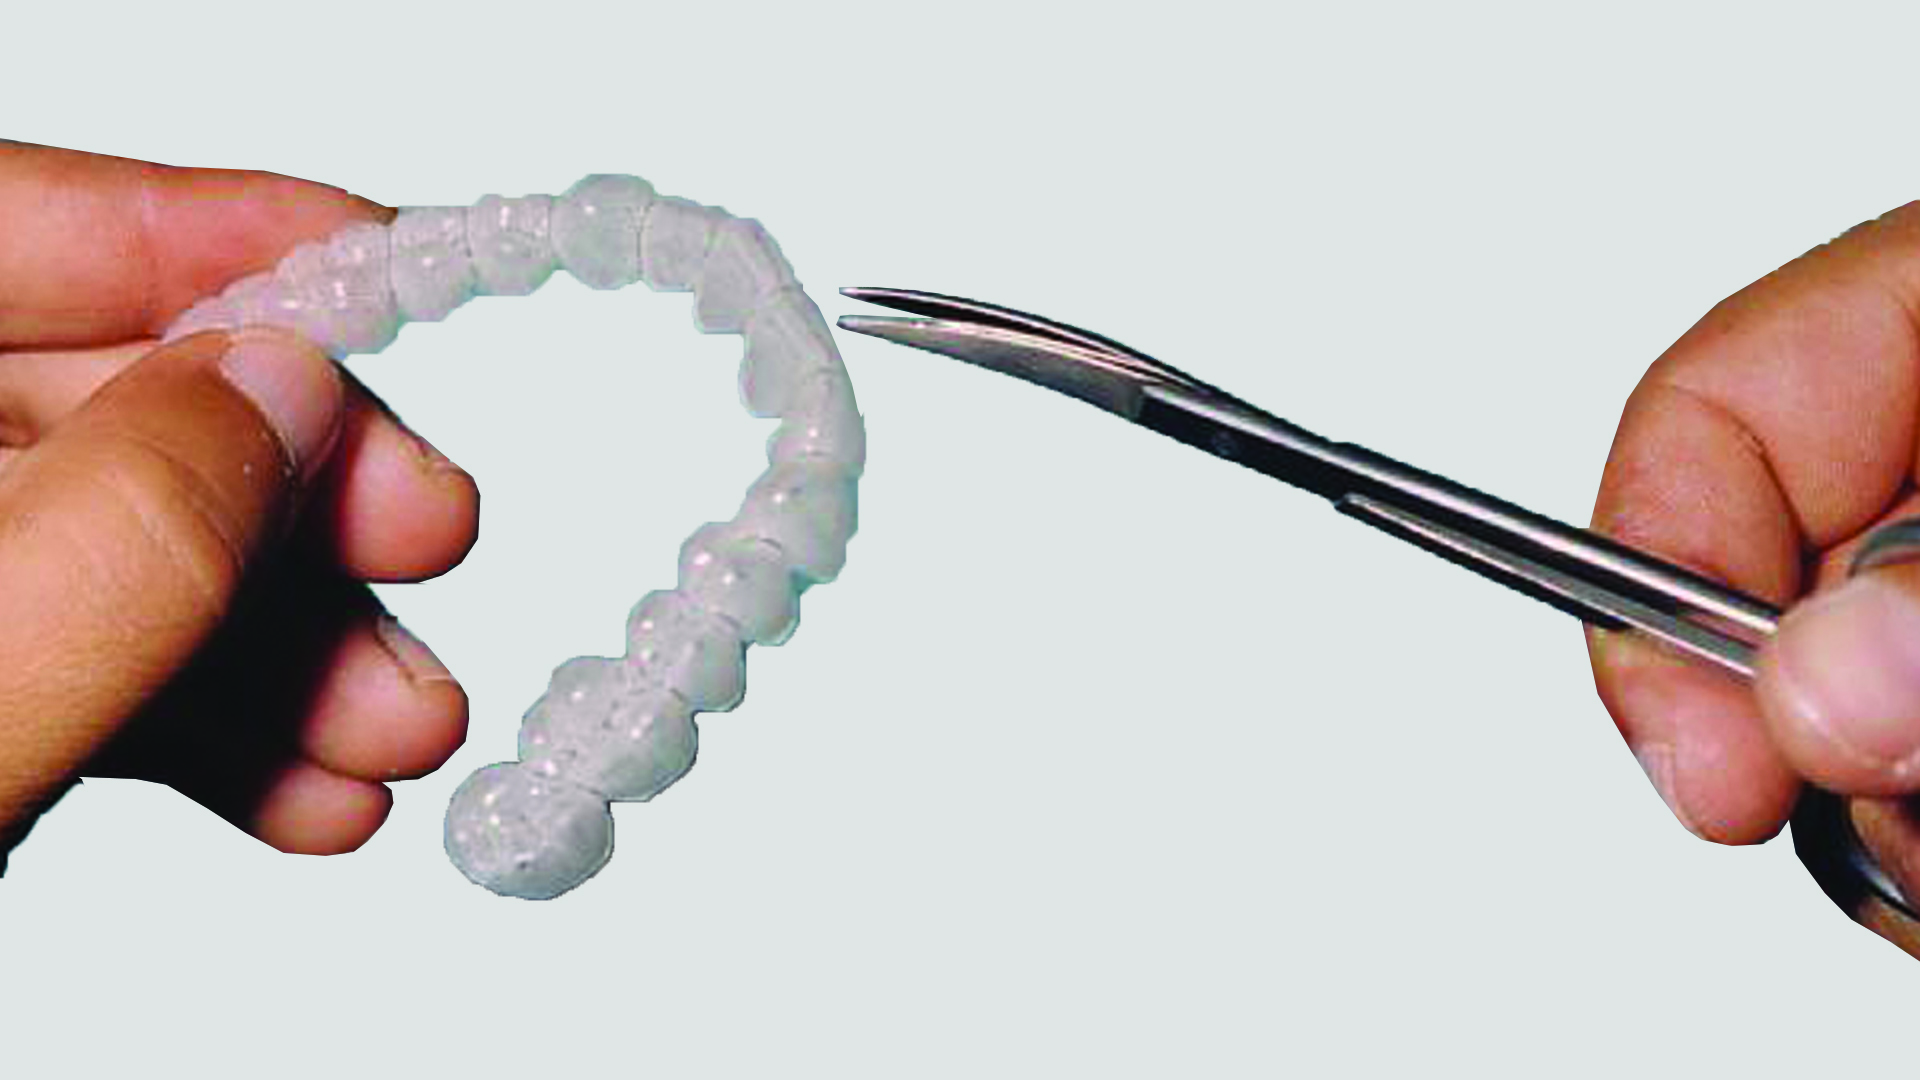
- To remove the plaster model from the mould, you need to cut away all the excess plastic with scissors and cutters: To make removal easier, the plastic should be cut as close as possible to the edge of the plaster model (Img. 13 - Img. 14).
WARNING: If you wish to use the mould, the plaster model must be positioned before starting the process.
WARNING: Always move the heating plate using the handle provided, as the plate becomes very hot during use.
Technical Specifications
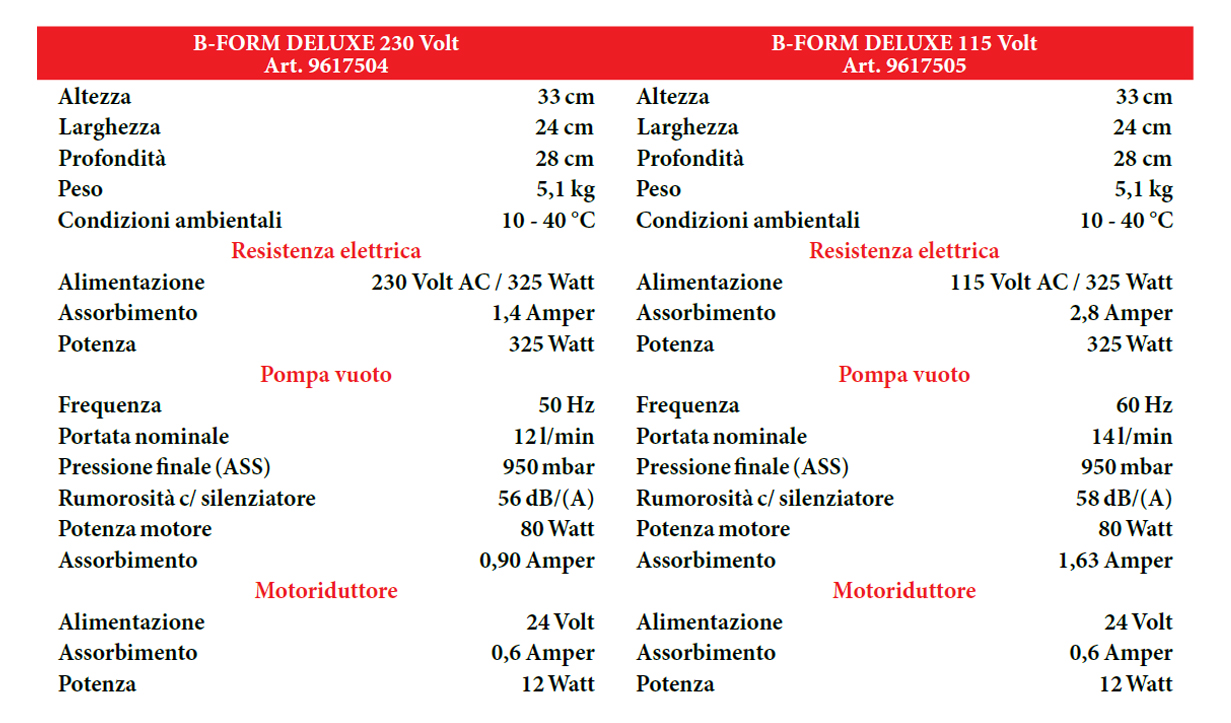
B-FORM® DELUXE
Automatic thermoforming machine with a modern and attractive design, constructed from top-quality materials. Equipped with a fast-responding quartz heating element and a powerful, quiet, state-of-the-art integrated vacuum motor, it enables the thermoforming process to be carried out more quickly and with the utmost precision.
In this specific model, the disc clamping plate is raised and lowered automatically, and the disc heating is also controlled automatically by an infrared temperature sensor, ensuring precise monitoring of the disc’s temperature without the need for operator intervention.
The B-FORM® Deluxe offers universal disc compatibility, meaning that all commercially available sheets materials and sizes (square 125 x 125 mm, round Ø 120 mm and Ø 125 mm) can be used without having to change your working habits.
It is also fitted with a moulding chamber, which enables the thermoforming process to be carried out and consistently achieves excellent professional results, even with very tall plaster models featuring undercuts, sharp edges and a palate or oral floor.
2 years warranty.
PRODUCT FOR PROFESSIONAL USE
Instructions for use
To ensure the B-FORM® Deluxe thermoforming machine is used correctly, please follow these instructions:
- Cleaning the IR temperature sensor
Clean the IR temperature sensor with a soft, dry cloth (Img. 29). - Switching on the thermoforming machine
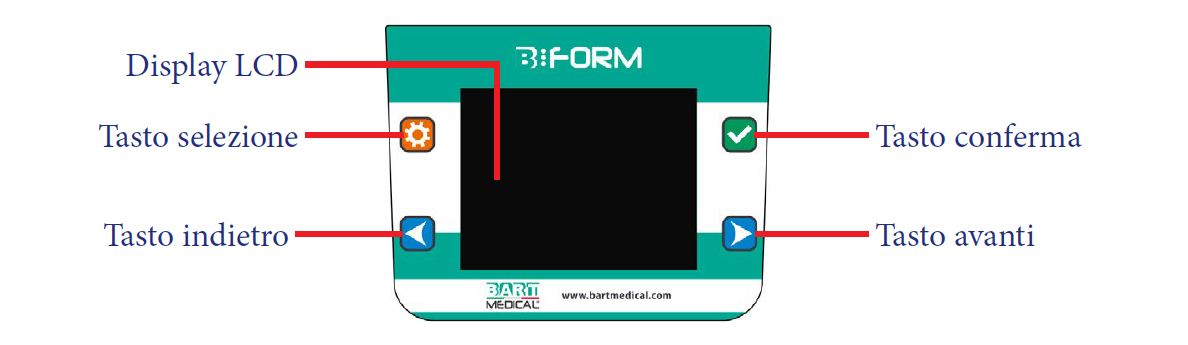
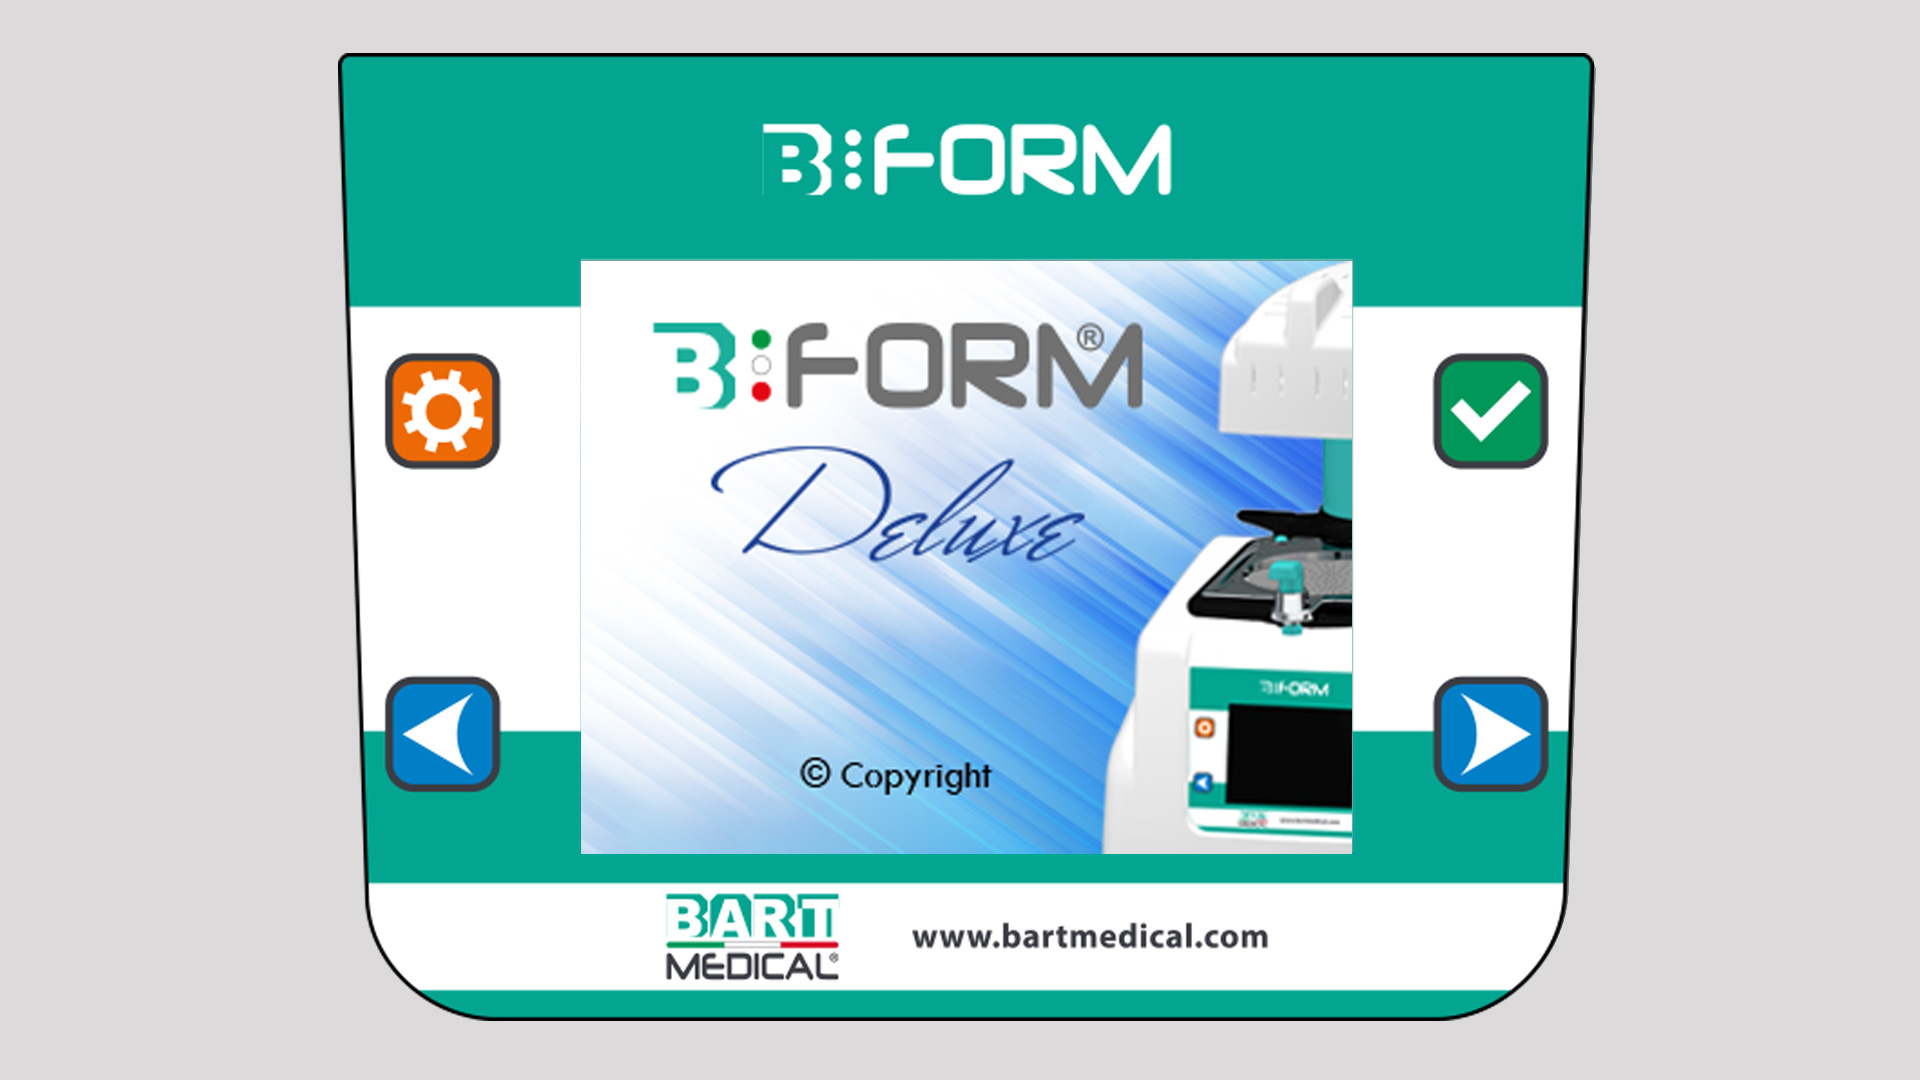
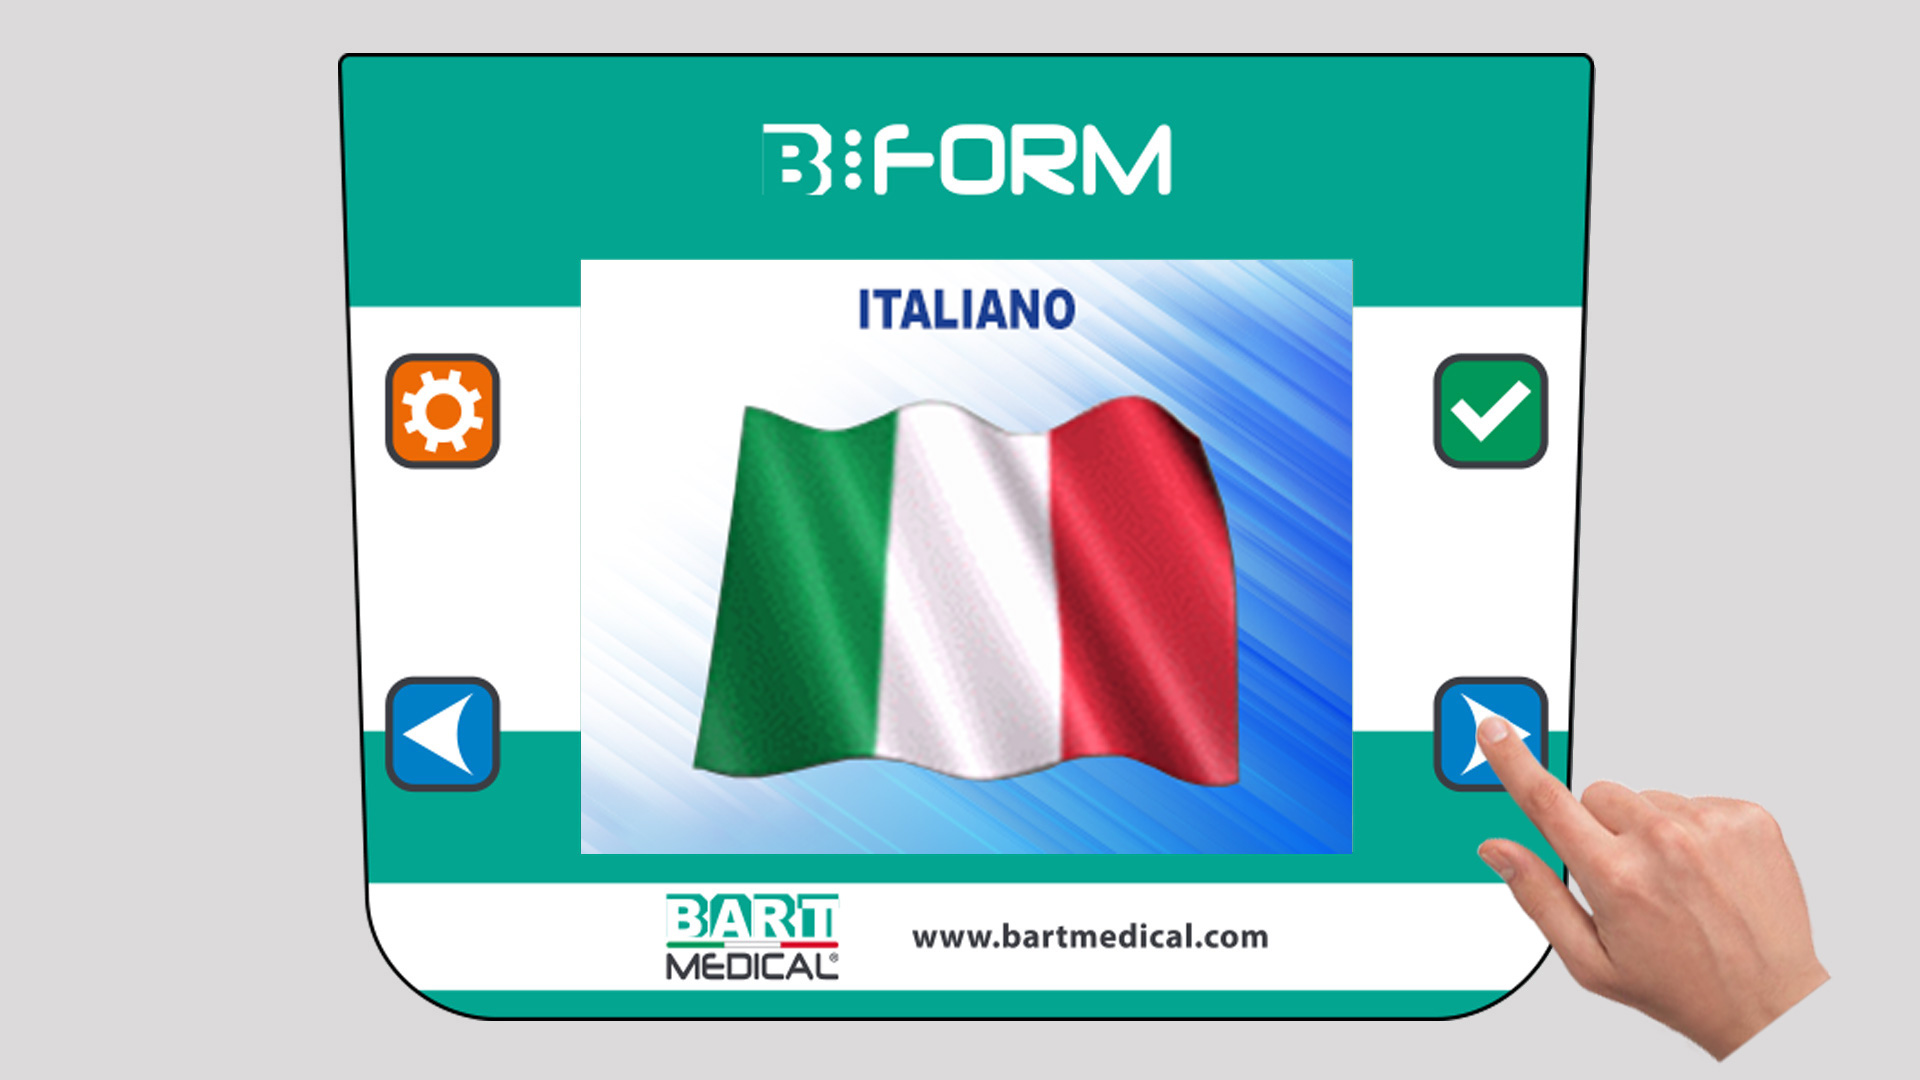
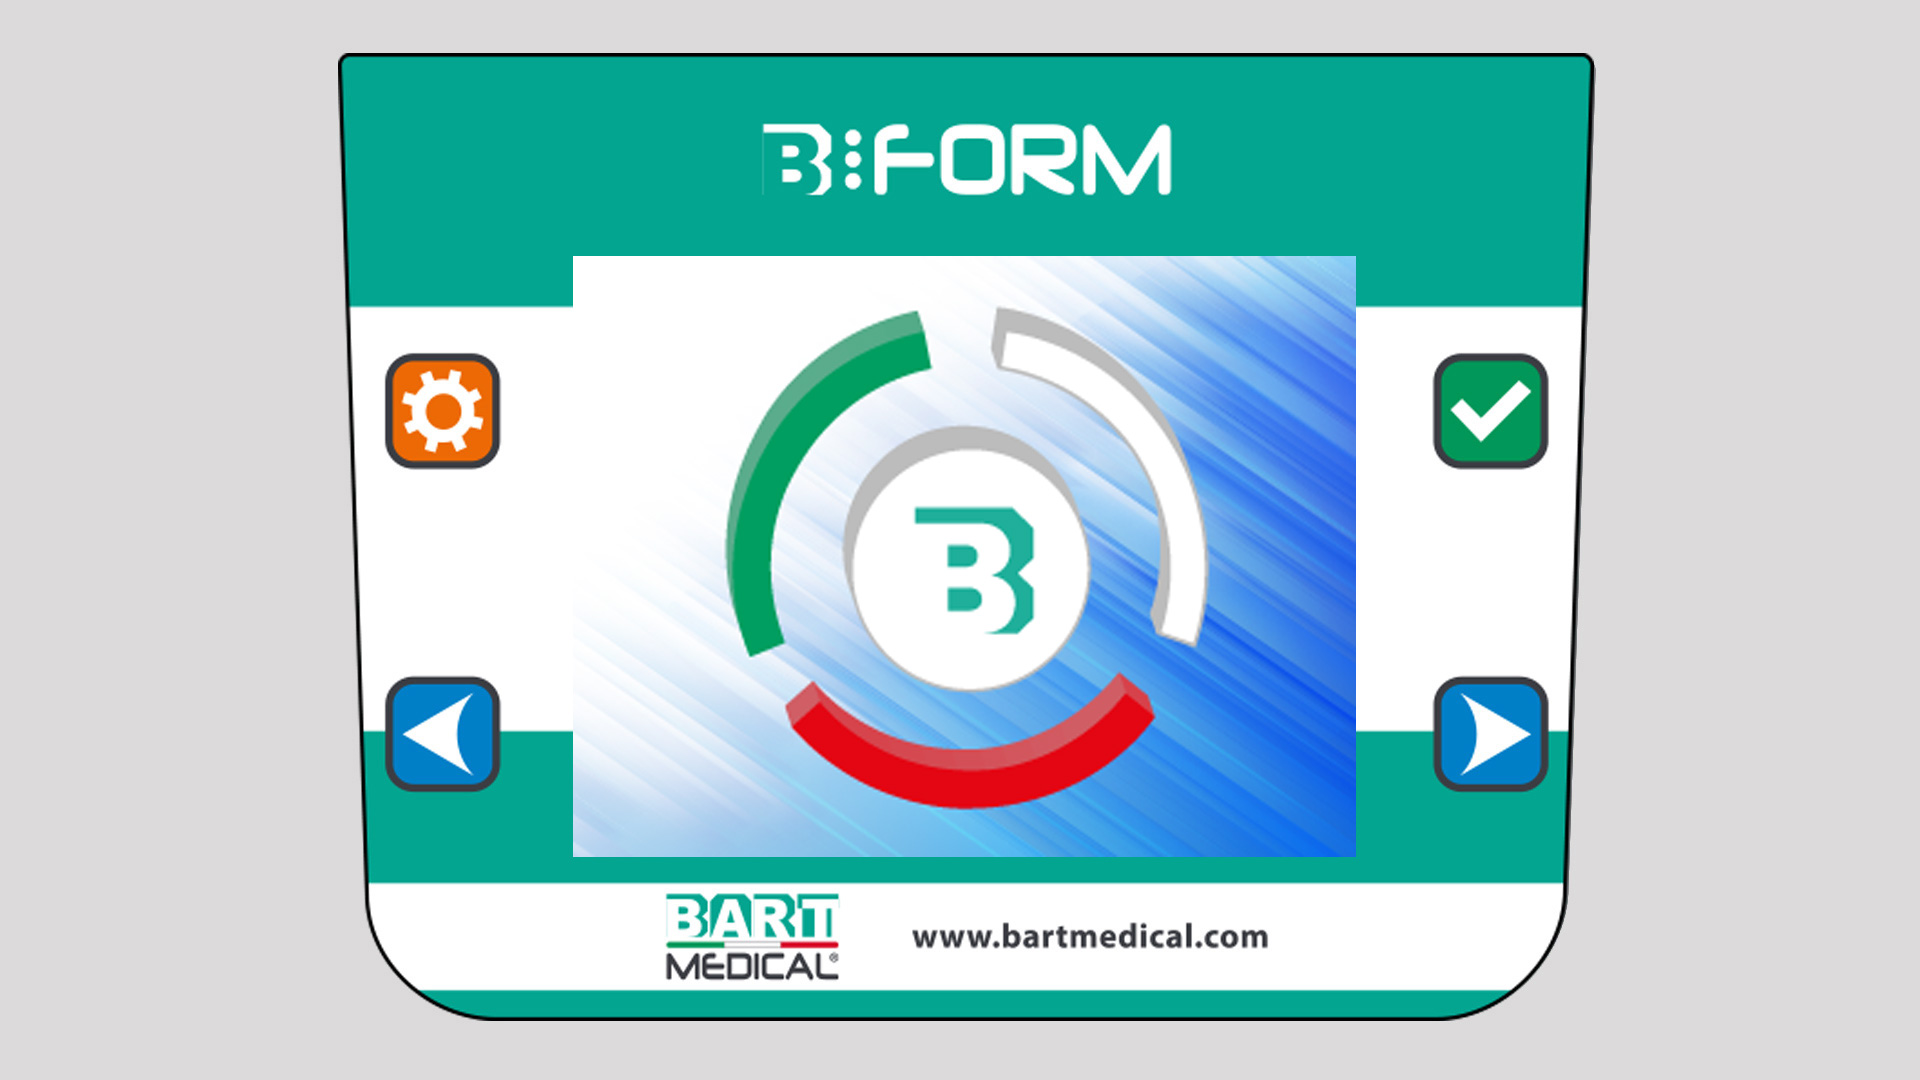
Plug the supplied power cable into the thermal printer at one end and into a mains socket at the other end. Switch the main switch on the back of the machine to the ‘I’ position. (Img. 6), the B-FORM® Deluxe logo appears on the LCD display for 5 seconds (Img. 15). Immediately afterwards, the ‘LANGUAGE SELECTION’ screen appears (Img. 16). - Language selection
By pressing the arrow keys
 you can select your preferred language and confirm by pressing the confirm button
  . The selected language is saved for the next time the device is started.
To return to the ‘LANGUAGE SELECTION’ menu, press the button .
. - Selecting the disc type
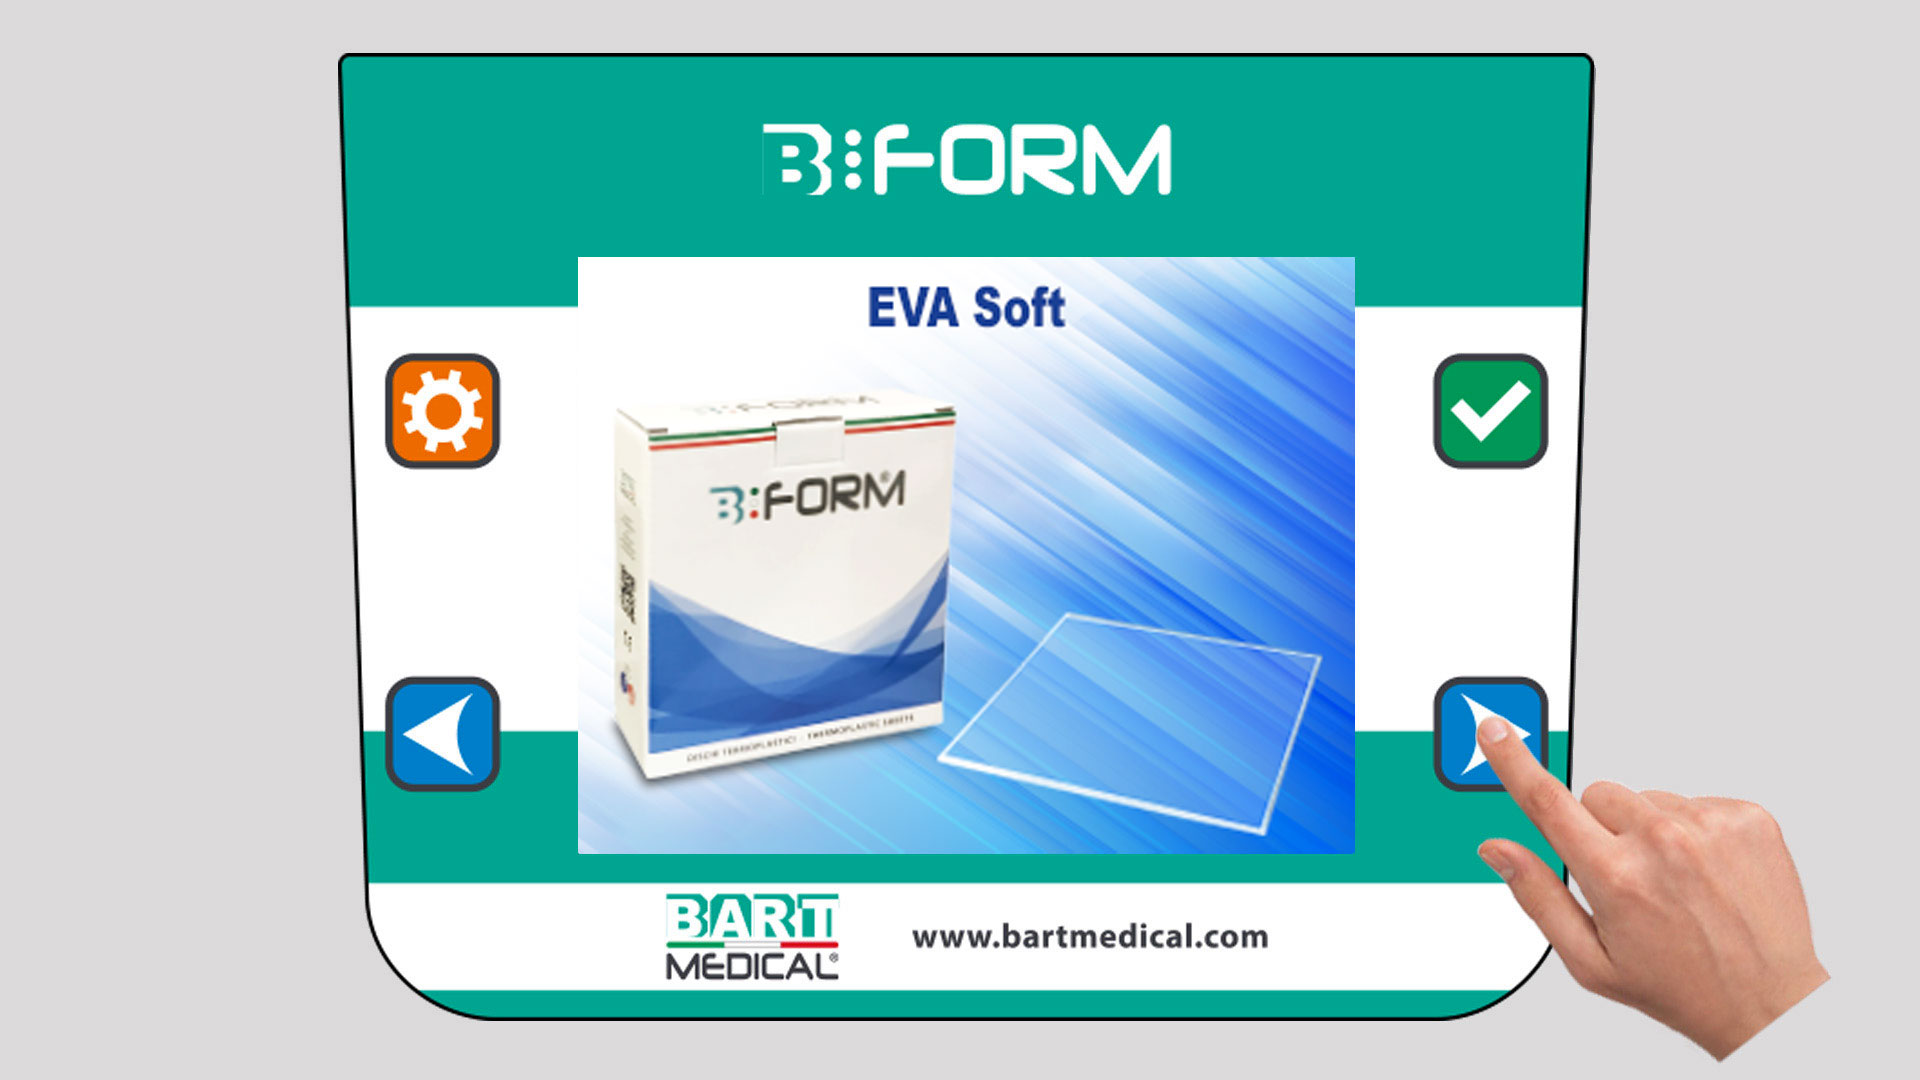
The ‘SHEETS MENU’ screen appears on the LCD display (Img. 17). - By pressing the next button or the back button you can scroll through the pages of the disk menu to select the type of disk you wish to format and confirm by pressing the ‘Confirm’ button .
- Turn the heating plate to the left (Img. 7).
- Open the clamping plate using the knob provided (by pressing it and turning it through 180°) and insert the thermoplastic sheet to be moulded. Then close the clamping plate, again using the knob provided.
- Turn the heating plate until it is pointing directly towards the clamping plate (Img. 11).
- Selecting the sheet thickness
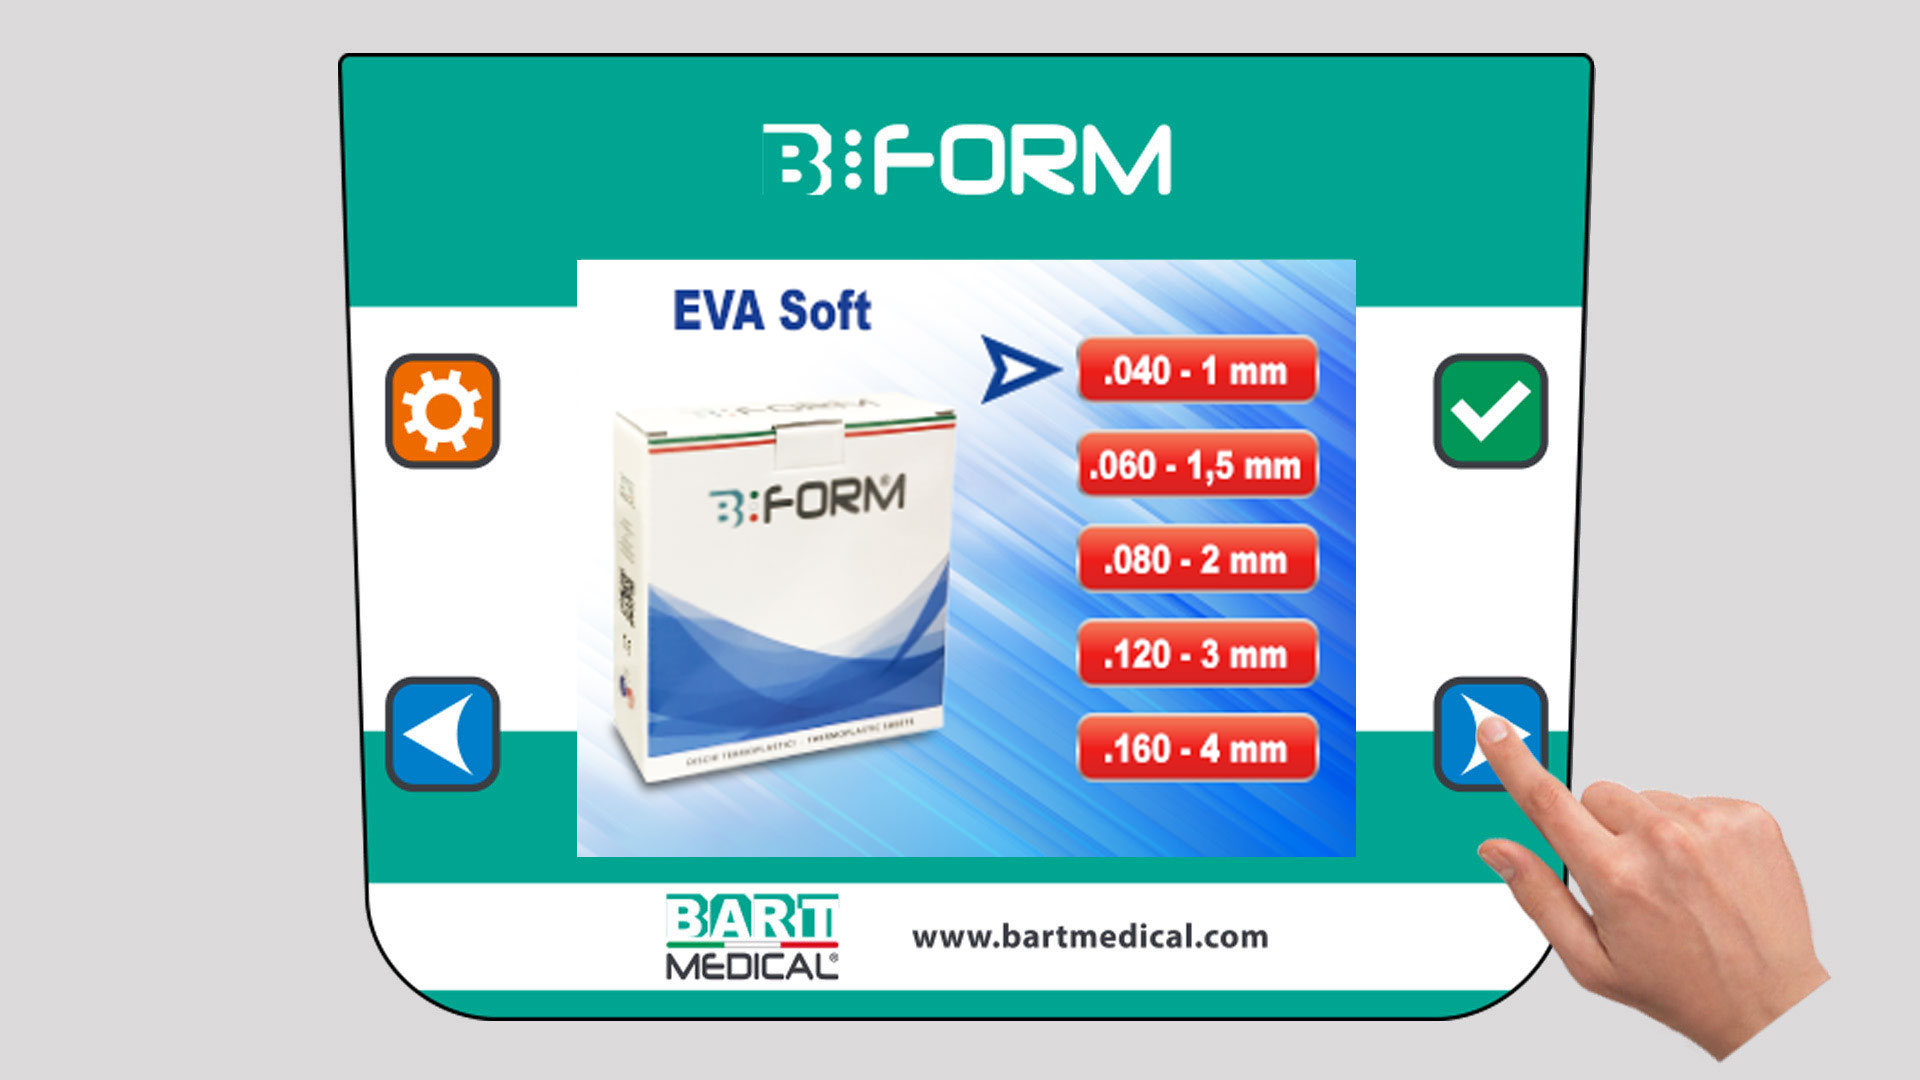
By pressing the direction buttons you can select the desired disc thickness and confirm by pressing the confirm button (Img. 18). - Thermoforming process
The B-FORM® Deluxe thermoforming machine enables the complete automation of the thermoforming cycle for square and round sheets.
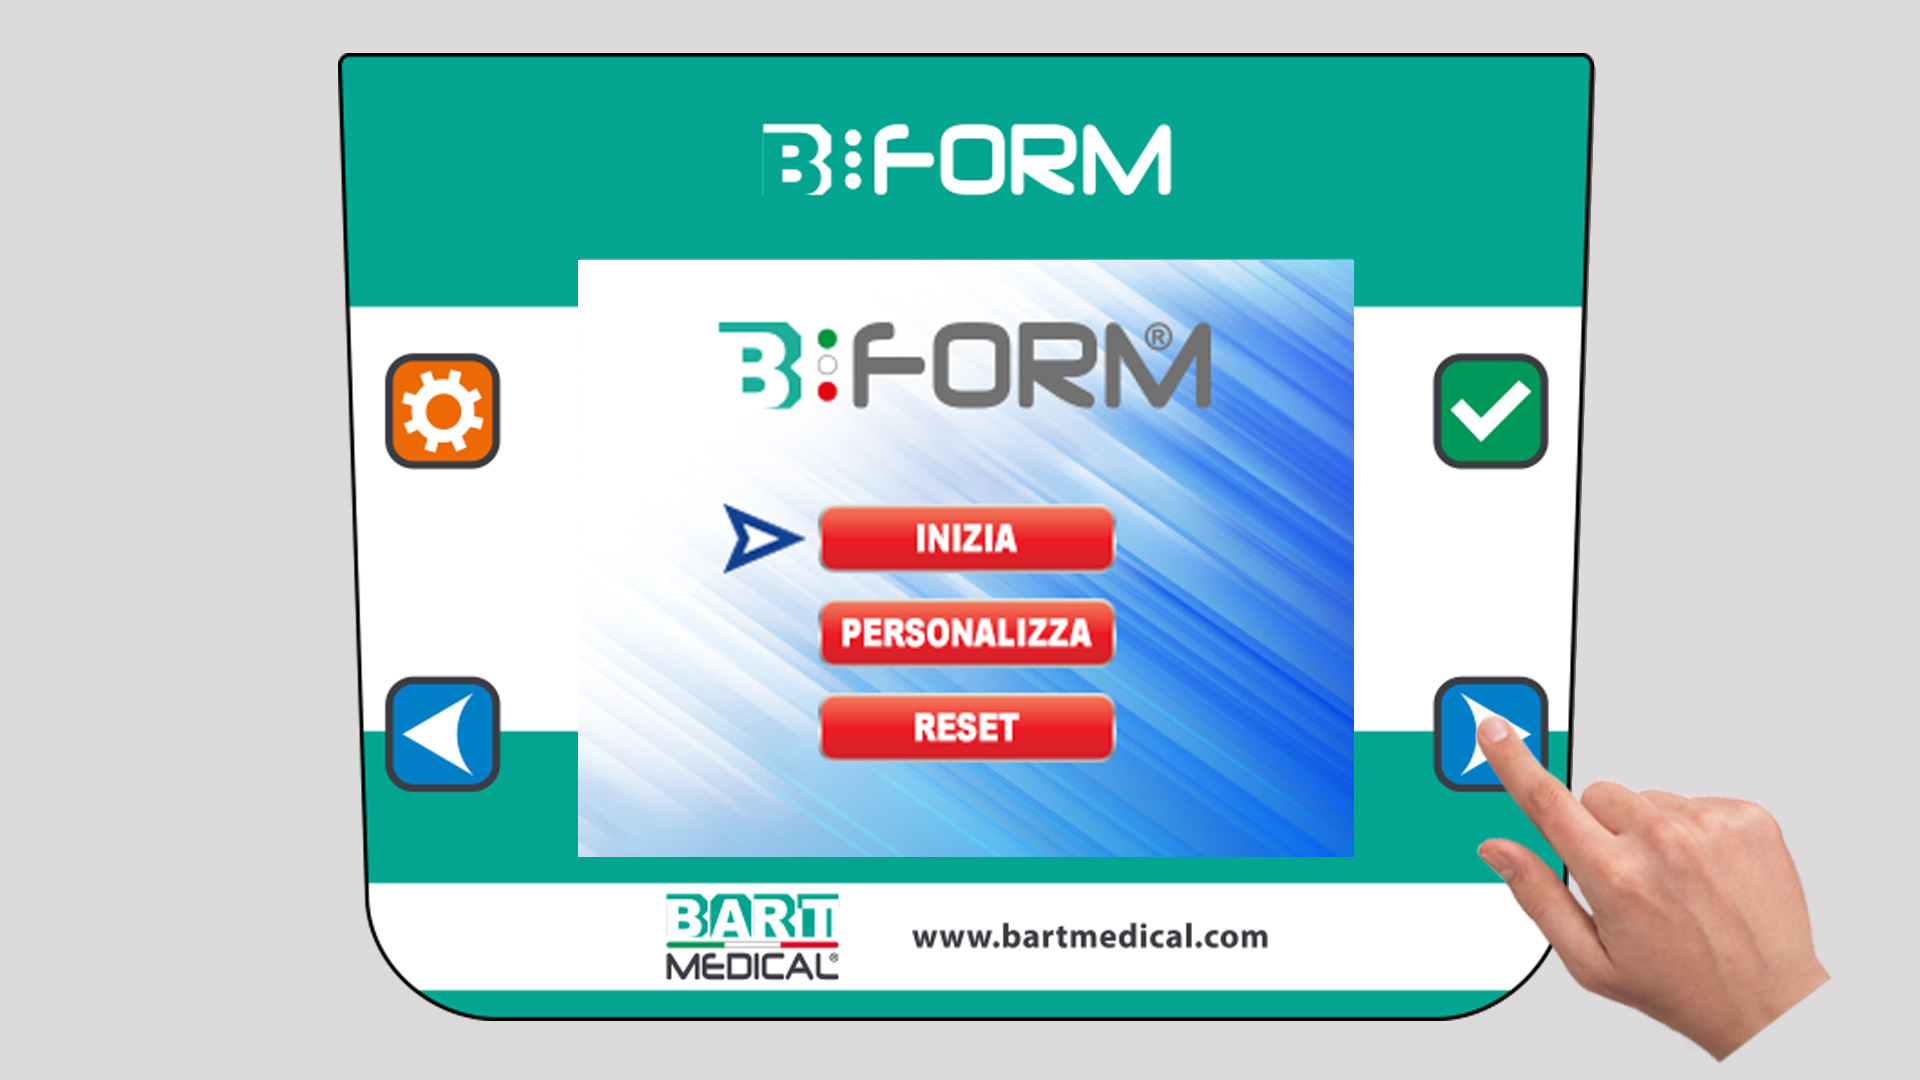
Once the thickness of the disc to be formed has been selected, the following screen appears on the LCD display (Img. 19).
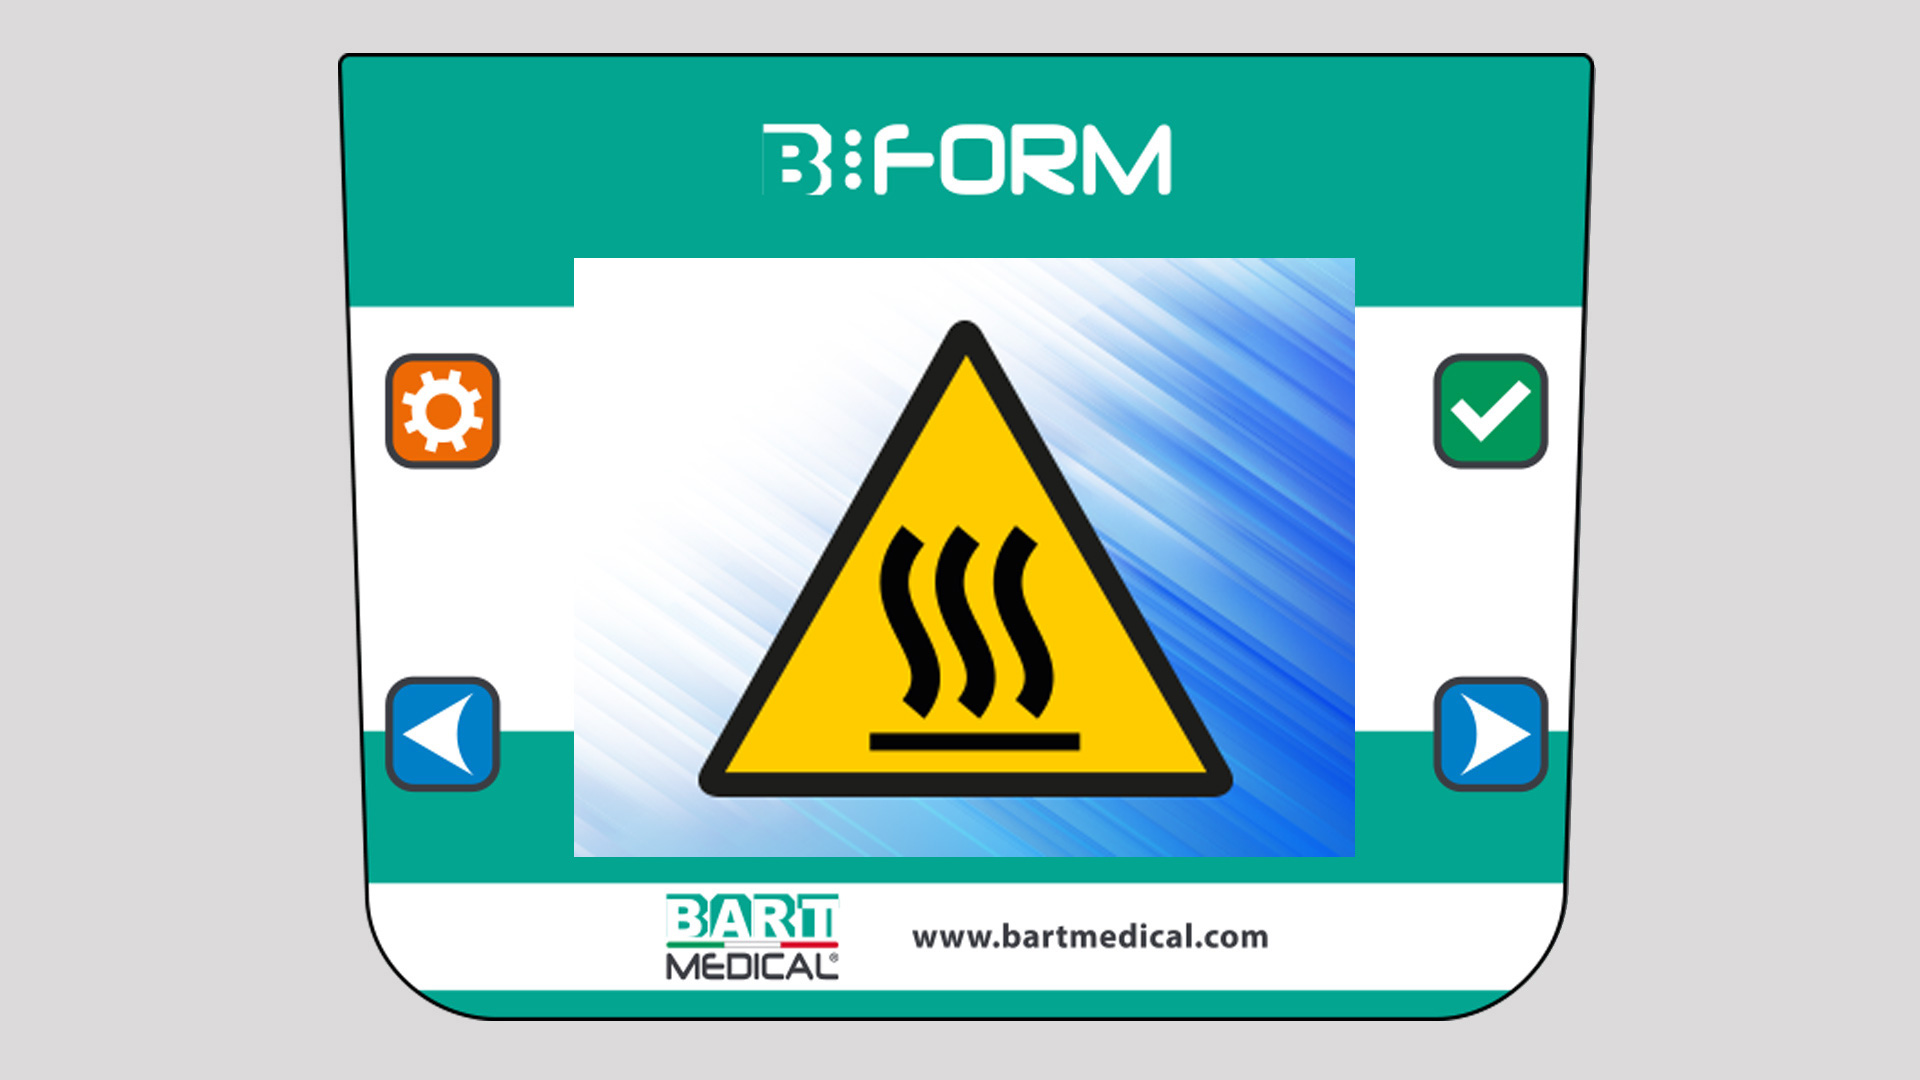
To start the thermoforming process, select ‘START’ by pressing the direction buttons and press the confirm button . The ‘hot surfaces’ symbol flashes on the LCD display for a few seconds (Img. 20).
When the clamping plate lifts upwards, place the plaster or resin model on the perforated plate or in the well after filling it with stainless steel granules (Fig. 2). The following screen appears whilst the sheet is heating up (Img. 21).
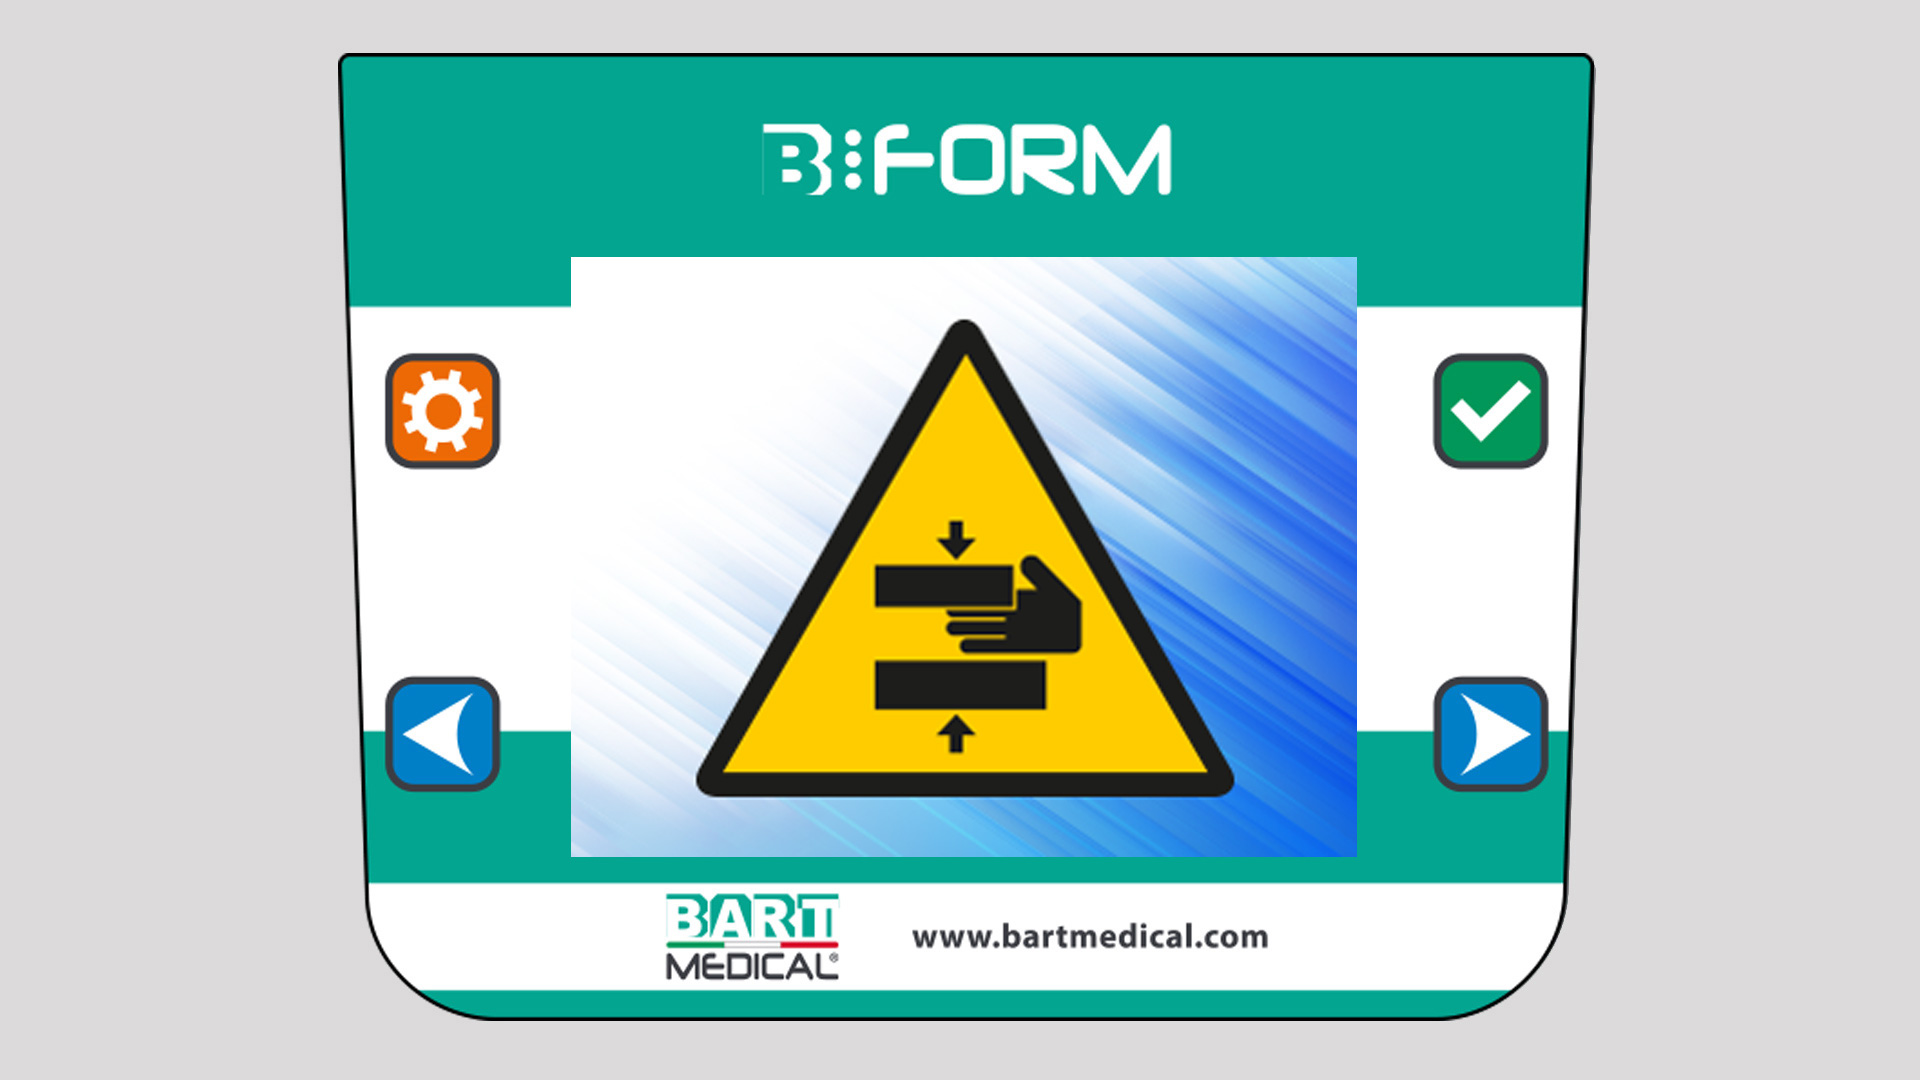
Once the plate has heated up completely, the clamping plate lowers and the ‘risk of pinching’ symbol flashes on the LCD display for a few seconds (Img. 22).
WARNING: If you wish to use the mould, the plaster model must be positioned before starting the process.
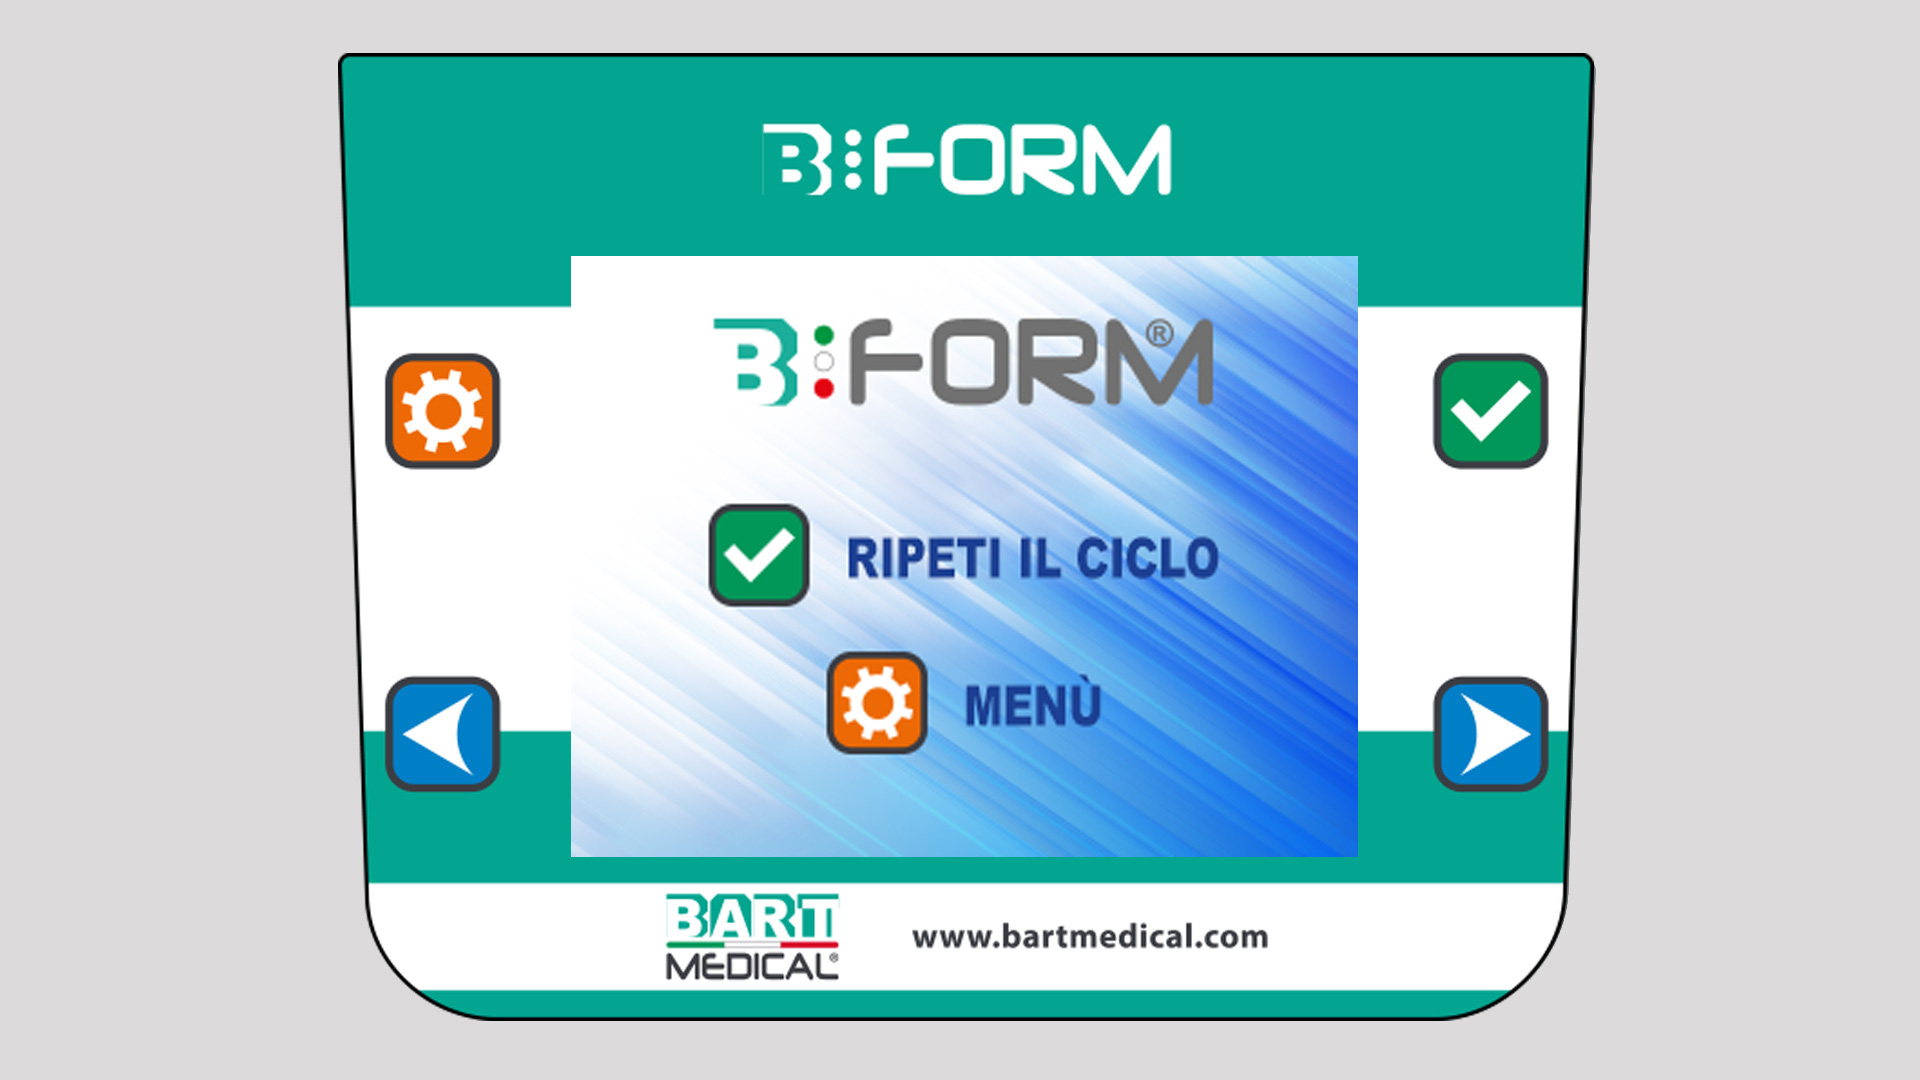
Once the thermoforming cycle is complete, the following screen appears on the LCD display (Img. 23). The clamping plate lifts a few centimetres off the base.
To run a new thermoforming cycle using the same type of disc, select “REPEAT CYCLE” using the confirm button or press the selection button to return to the ‘SHEETS MENU’. - Temperature customisation
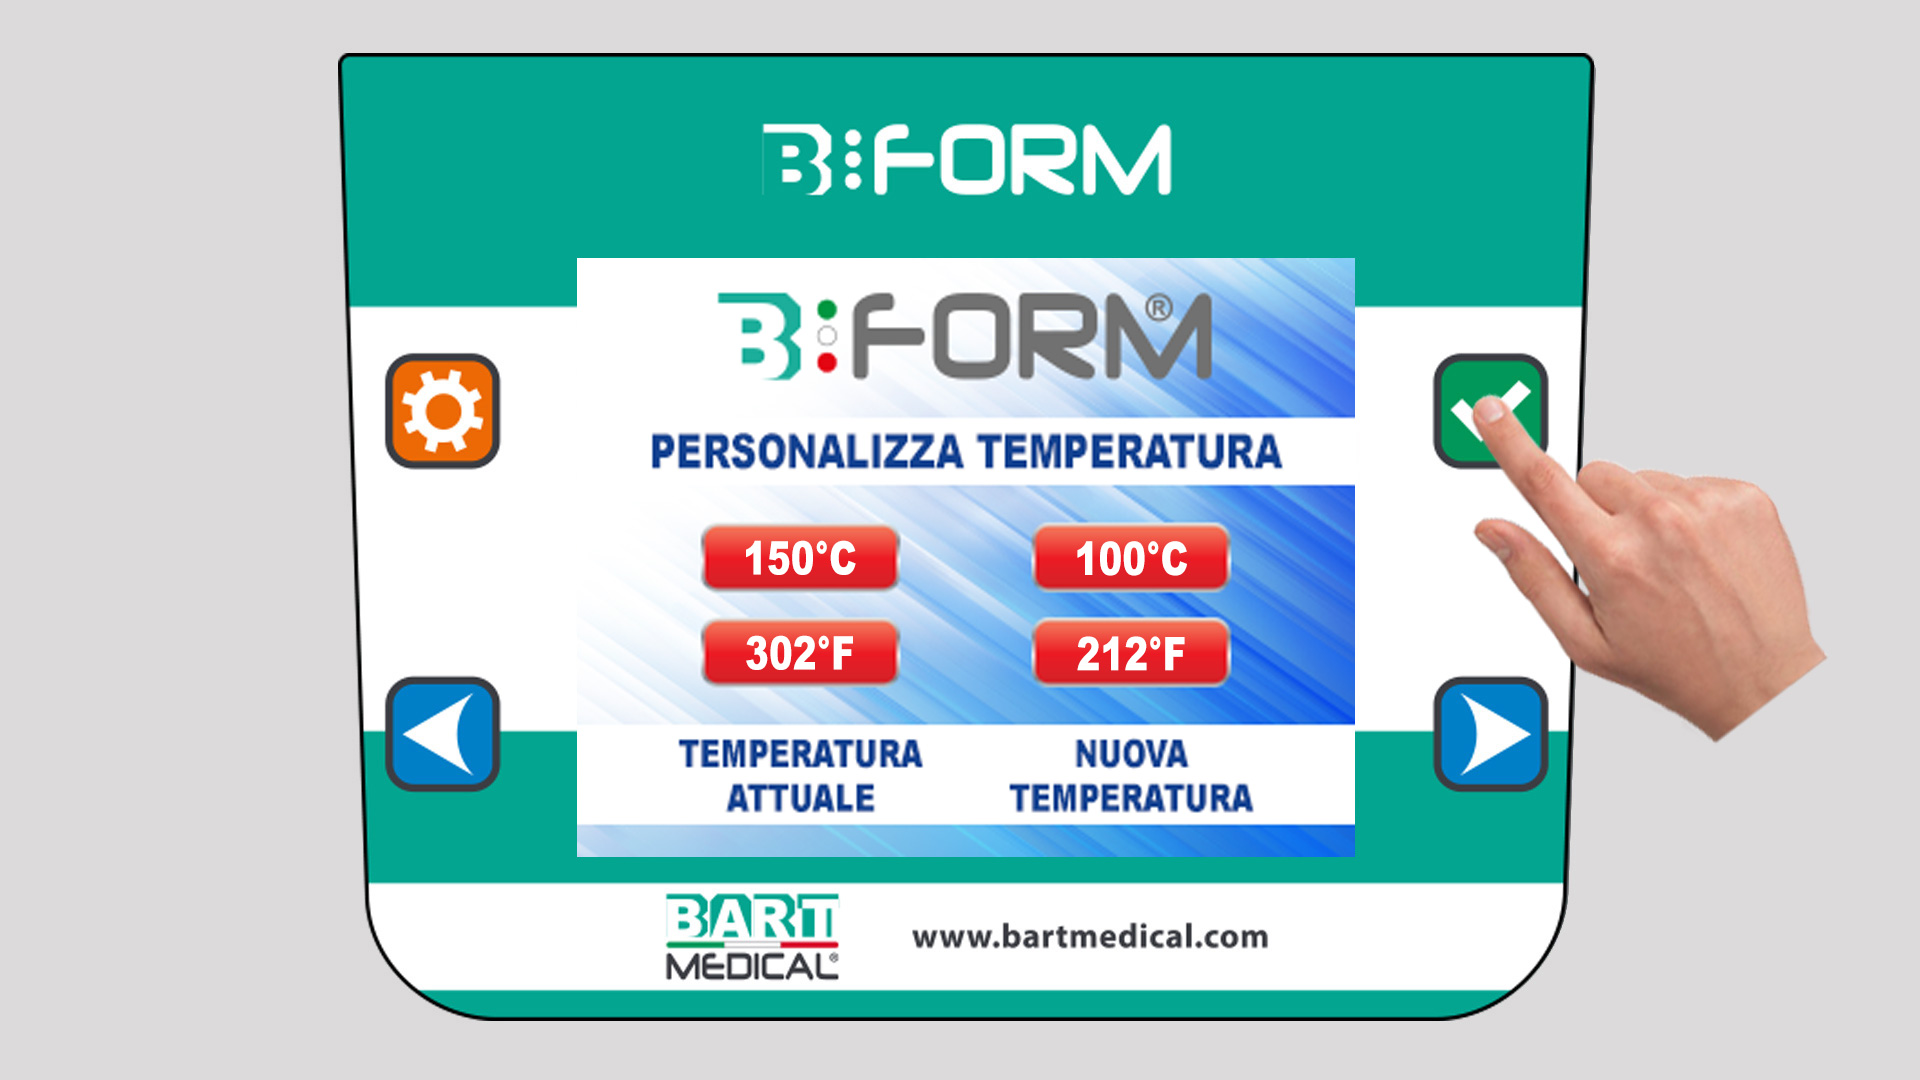
If you are not satisfied with the factory-set temperature and would prefer the disc to be slightly warmer or cooler, the B-FORM® Deluxe thermal printer allows you to customise the temperature for each individual sheet.
Proceed as follows: - Once you have selected the thickness of the disc to be formatted, the following screen appears on the LCD display (Img. 19). Select “CUSTOMISE” by pressing the arrow keys and press the confirm button .
The following screen appears on the LCD display (Img. 24). - The temperature stored in memory (°C / °F) is displayed on the left-hand side of the screen. The new temperature to be set (°C / °F) is displayed on the right-hand side.
- Once the desired temperature has been reached, press the confirm button to save the setting and the thermoforming process will end automatically.
- If you are not satisfied with the new temperature you have just customised, you can customise another one, and so on, until you have found a temperature that suits you.
- Restoring the factory temperature settings
If you are not satisfied with the customised temperature, the B-FORM® Deluxe thermoforming machine allows you to reset the temperature to the factory setting.
Proceed as follows: - Once you have selected the thickness of the disc to be formatted, the following screen appears on the LCD display (Img. 19). Select “RESET” by pressing the direction buttons. and press the confirm button .
A ‘beep’ indicates that the reset has been completed. - Temperature storage in a new type of sheet
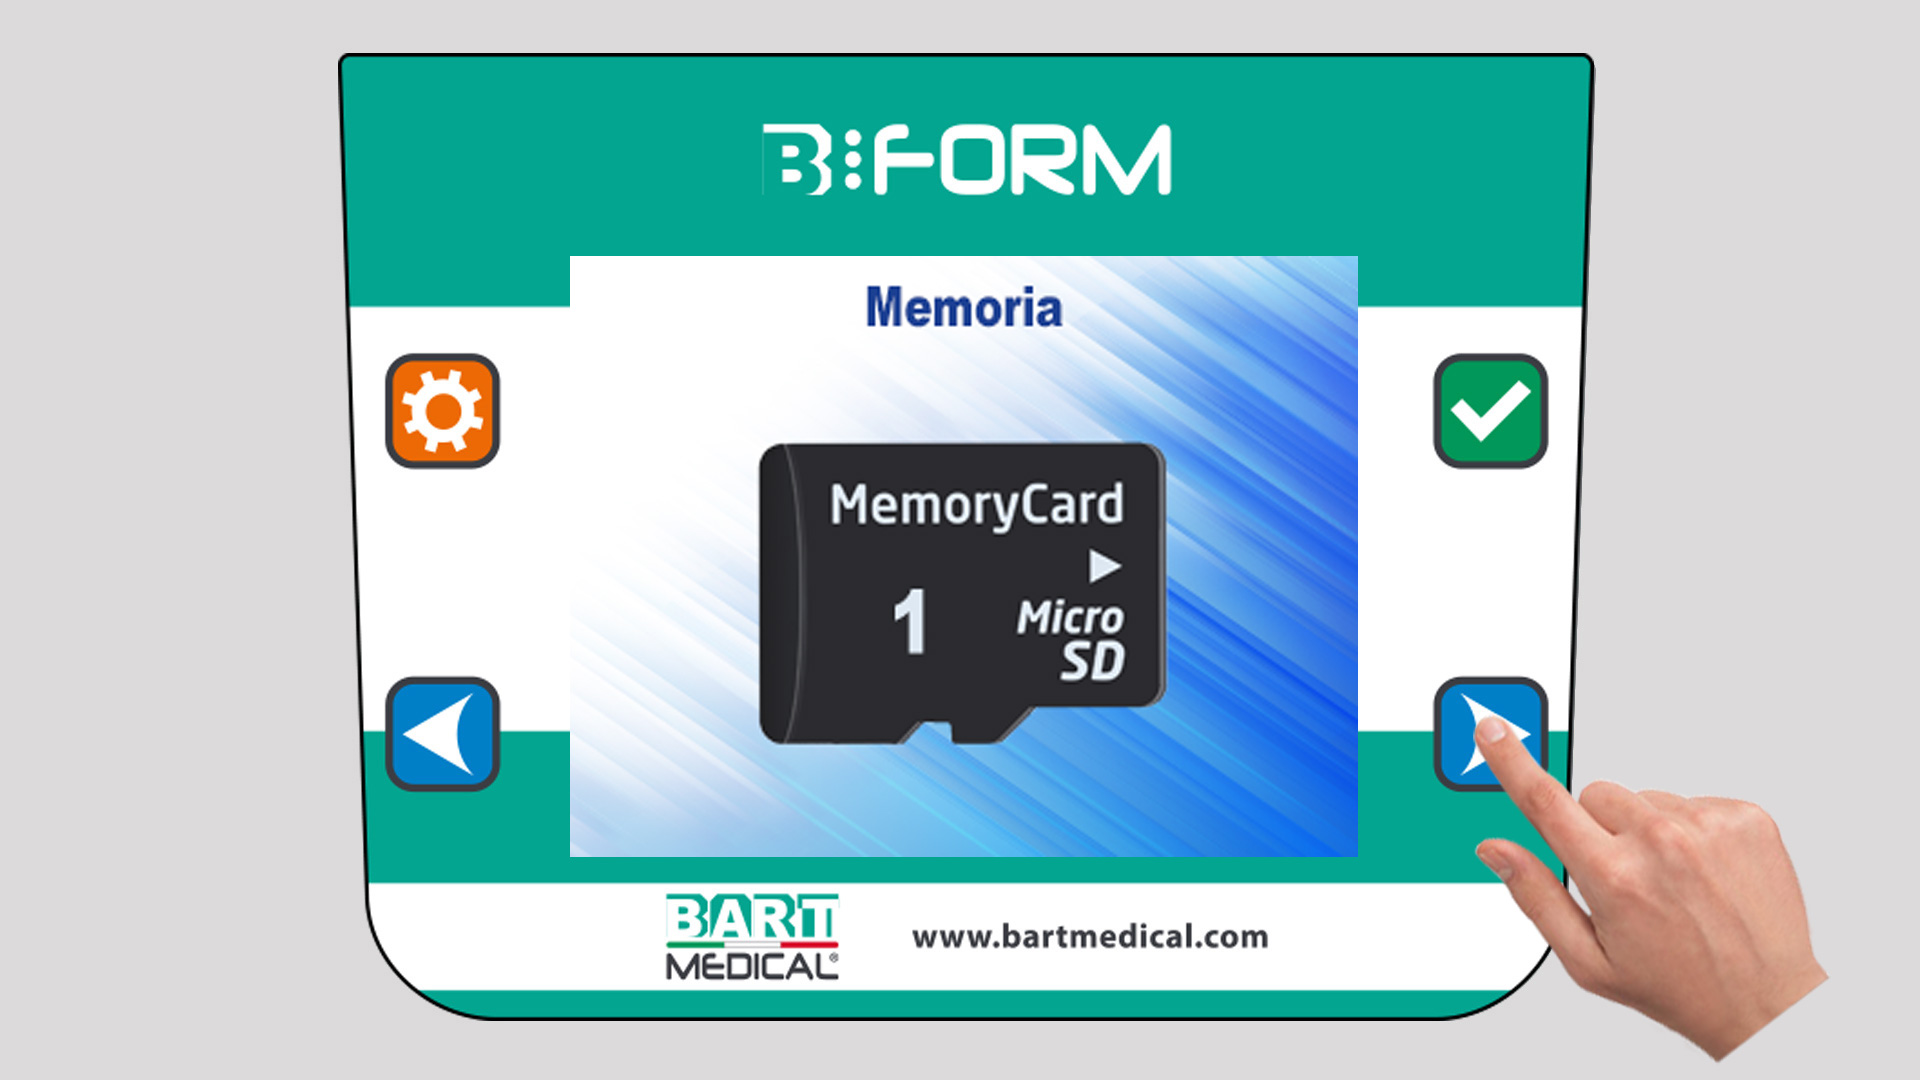
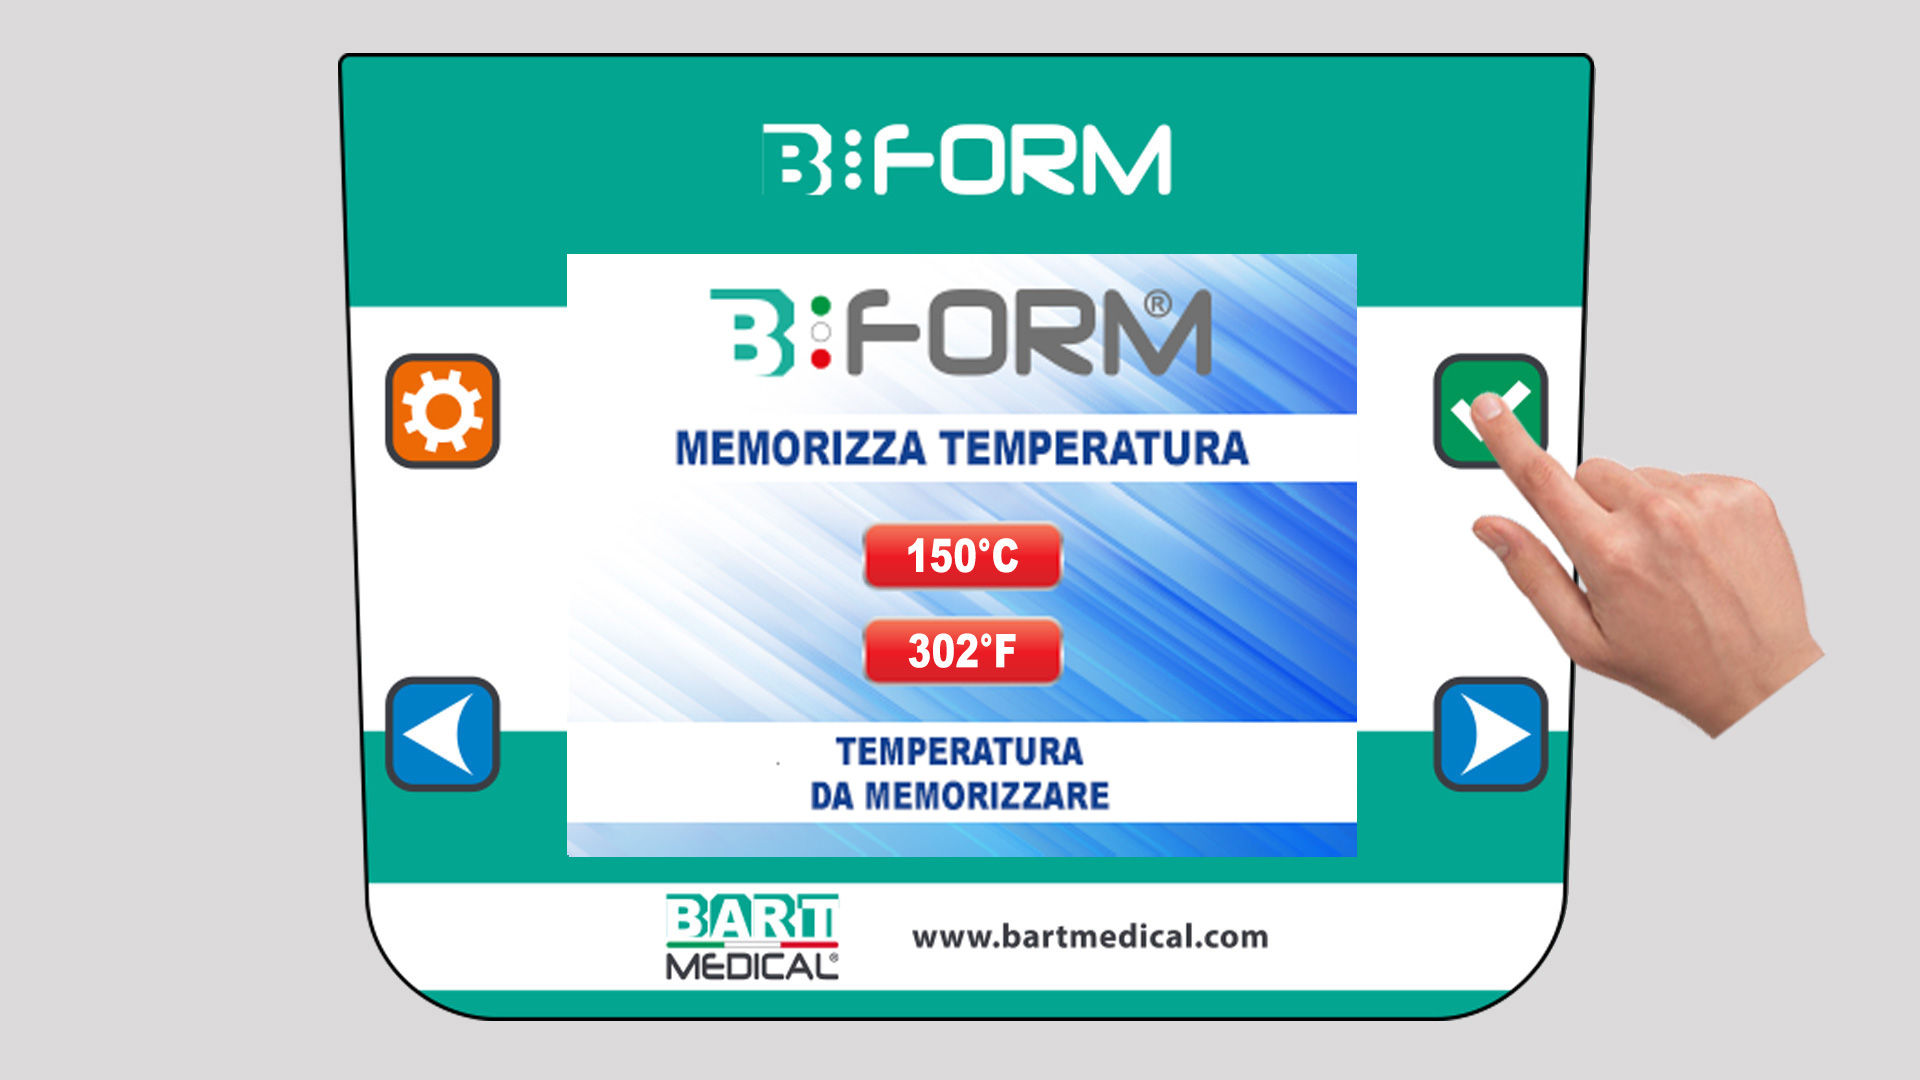
If you wish to thermoform a sheet that is not stored in the software, the B-FORM® Deluxe allows you to store up to 10 new sheets.
Proceed as follows: - The “SHEET MENU” screen appears on the LCD display (Img. 17).
- Select one of the 10 memory cards, for example ‘MEMORY 1’, by pressing the arrow keys and press the confirm button (Img. 25).
The following screen appears on the LCD display (Img. 26). - The display shows the temperature to be stored (°C / °F) in real time.
- Once the desired temperature has been reached, press the confirm button to save the setting and the thermoforming process will stop automatically.
- If you are not satisfied with the temperature you have just saved, you can save another one, and so on, until you find a temperature that suits you. In this way, you can overwrite the temperature in the same memory slot an unlimited number of times. Remember to link the name of the sheet you have just formatted to the memory card.
- Removal of the thermoformed sheet
At the end of the process, the clamping plate lifts a few centimetres off the base (this helps to prolong the service life of the clamping plate’s round sealing). - Turn the heating plate to the left (Img. 7) and allow the newly made byte to cool using compressed air.
- Once the byte has cooled, use the handle provided to open the clamping plate and remove the mould together with the plaster model.
- To remove the plaster model from the byte, you need to cut away all the excess plastic with scissors and cutters: To make removal easier, the plastic should be cut as close as possible to the edge of the plaster model (Img. 13 - Img. 14).
- Thermoforming of the Dual Laminate sheet
When thermoforming B-FORM® Dual Laminate sheet, your intervention will be required at a certain stage of the thermoforming process. This type of sheet requires double heating: it must first be heated on one side and then on the other.
Proceed as follows: - Turn the heating plate to the left (Img. 7).
- Open the clamping plate using the knob provided (by pressing it and turning it through 180°) and insert the thermoplastic sheet to be formatted.
- Then close the clamping plate, again using the knob provided.
- Turn the heating plate until it is pointing directly towards the clamping plate (Img. 11).
- The “SHEETS MENU” screen appears on the LCD display (Img. 17).
- Select the Dual Laminate sheet by pressing the direction buttons and press the confirm button .
- Once you have selected the thickness of the sheet to be formatted, the following screen appears on the LCD display (Img. 19).
- To start the thermoforming process, select ‘START’ by pressing the direction buttons and press the confirm button .
The ‘hot surfaces’ symbol flashes on the LCD display for a few seconds (Img. 20). - Place the plaster model on the perforated plate or in the recess after filling it with stainless steel granules (Fig. 2).
- The following screen appears whilst the sheet is heating up (Img. 21).
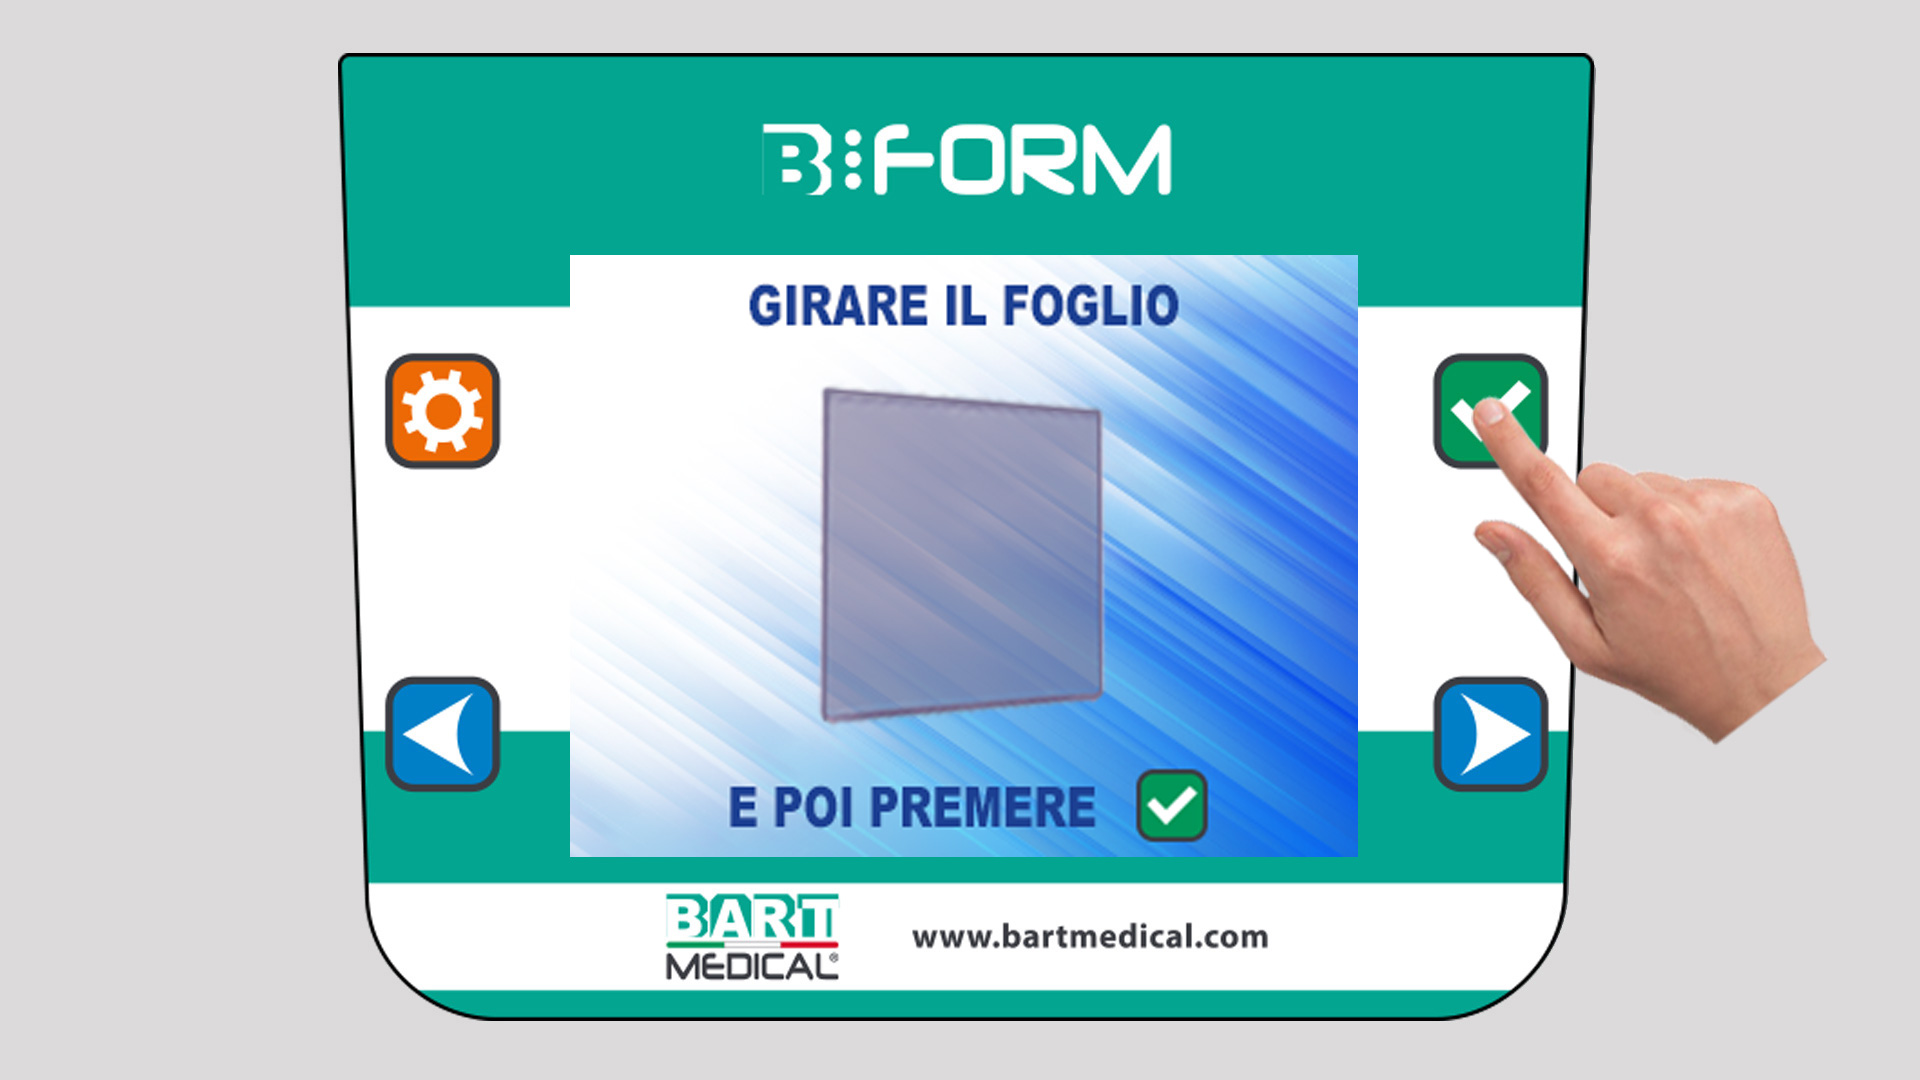
- When the soft side of the Dual Laminate sheet reaches its heating temperature, the following screen appears on the LCD display (Img. 27).
- Turn the heating plate to the left (Img. 7).
- Open the clamping plate using the knob provided (by pressing it and turning it through 180°) and, using tweezers, grasp the disc and turn it so that the hard side, which has not yet been heated, is facing upwards.
- Then close the clamping plate, again using the knob provided.
- Turn the heating plate until it is pointing directly towards the clamping plate (Img. 11).
- Press the confirm button to restart the process. The following screen reappears on the LCD display (Fig. 21).
- Once the sheet has finished heating up, the clamping plate lowers and the ‘risk of pinching’ symbol flashes on the LCD display for a few seconds (Img. 22).
- Once the thermoforming process is complete, the following screen appears on the LCD display (Img. 23). The clamping plate lifts a few centimetres off the base.
To carry out a new thermoforming process using the same type of disc, select “REPEAT CYCLE” using the confirm button or press the selection button to return to the ‘SHEETS MENU’. - Turn the heating plate to the left (Img. 7) and allow the newly made byte to cool using compressed air.
- Once the byte has cooled, use the handle provided to open the clamping plate and remove the mould together with the plaster model.
- To remove the plaster model from the byte, you need to cut away all the excess plastic with scissors and cutters: To make removal easier, the plastic should be cut as close as possible to the edge of the plaster model (Img. 13 - Img. 14).
- Customising the temperature of the Dual Laminate disc
If you are not satisfied with the factory-set temperature and would prefer the disc to be slightly warmer or cooler, the B-FORM® Deluxe thermal printer allows you to customise the temperature of each individual disc.
Proceed as follows: - Once you have selected the thickness of the sheet to be formatted, the following screen appears on the LCD display (Img. 19). Select “CUSTOMISE” by pressing the direction buttons and press the confirm button .
The following screen appears on the LCD display (Img. 24). - The temperature stored in memory (°C / °F) is displayed on the left-hand side of the screen. The new temperature to be set (°C / °F) is displayed on the right-hand side.
- Once the desired temperature has been reached, press the confirm button to save the setting and the thermoforming process will stop automatically.
- If you are not satisfied with the new temperature you have just set, you can set another one, and so on, until you find a temperature that suits you.
WARNING: Always move the heating plate using the handle provided, as the plate becomes very hot during use.
WARNING: Always move the heating plate using the handle provided, as the plate becomes very hot during use.
WARNING: If you wish to use the mould, the plaster model must be positioned before starting the process.
WARNING: Always move the heating plate using the handle provided, as the plate becomes very hot during use.
WARNING: You can only adjust the temperature of the soft side of the Dual Laminate sheet.
Technical Specifications
Symbols
This guide uses the following symbols to highlight important information. Always follow the instructions marked with these symbols.
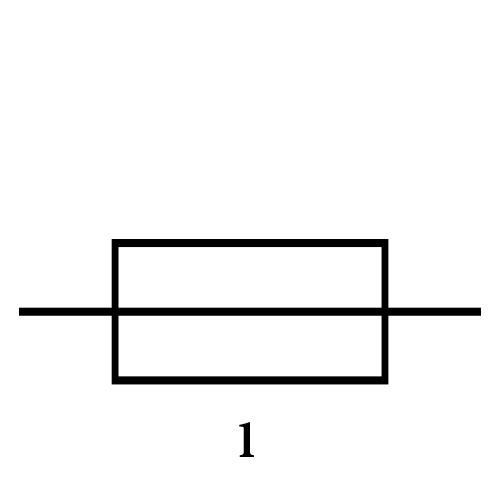
- 1 - Fuse
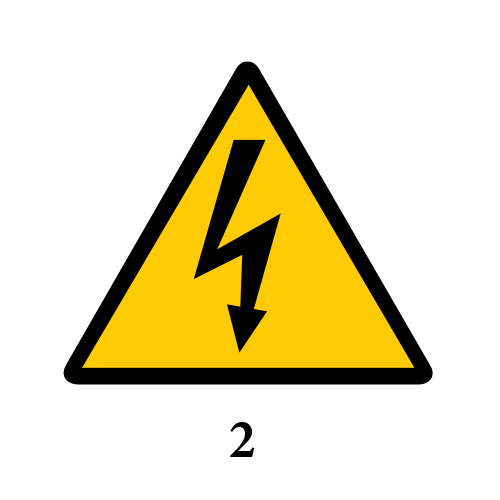
- 2 - Electrical voltage
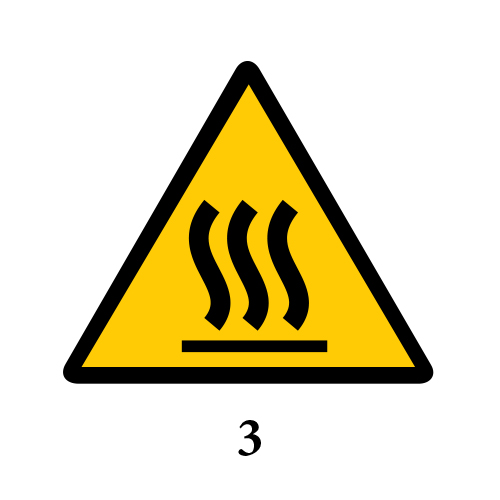
- 3 - Hot surfaces
- 4 - Risk of pinching

WARNING: These symbols indicate instructions which, if not followed, may result in serious injury to persons and/or damage to property caused by the incorrect use of the equipment. These instructions must be followed to ensure safe use.
Disposal
For the disposal of B-FORM® thermoforming machines, please refer to the relevant legislation in each country.
FAQs
Would you like to find out more?Read the FAQs about the product.
1. The sheet has not been heated correctly and requires further heating. We recommend following the heating instructions set out in the ‘Temperatures and times’ section.
2. The thermoforming machine is experiencing suction problems due to wear and tear on components (seals, vacuum motor) or excessive dirt build-up in the various filters, which is preventing the air flow from passing through correctly.
Manufacturer

BART MEDICAL S.R.L.
Viale Vincenzo Randi 118
48124 Ravenna (RA)
+39 0544 523326
sales@bartmedical.com
www.bartmedical.com
Support
For further information and technical support, please contact us by email at sales@bartmedical.com